Catherine Hu
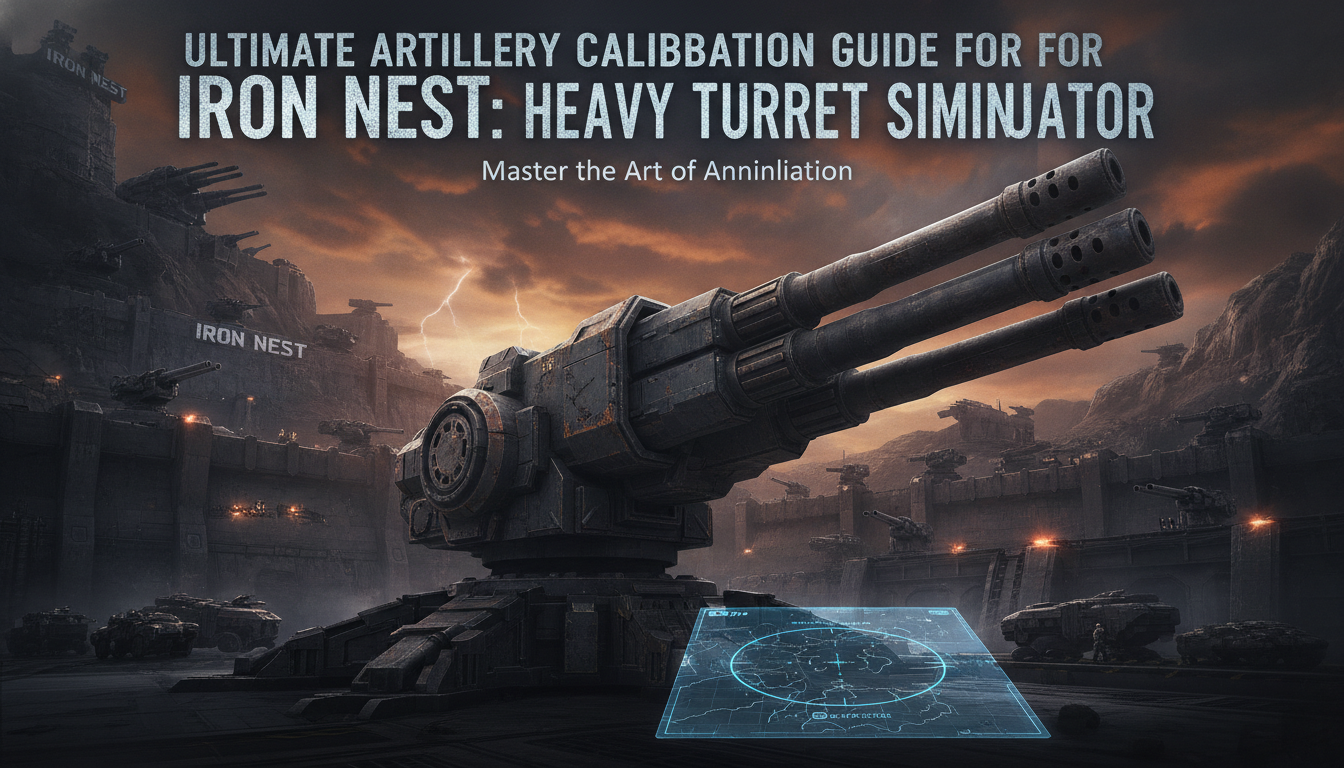
Nothing screams failure quite like watching your hydraulic lines violently rupture because you misread the primary pressure gauge by a single tick, sending a 1,000-pound shell harmlessly into a dirt mound 200 meters short of the target. IRON NEST: Heavy Turret Simulator is not a game about pointing a crosshair and clicking; it is a brutal, claustrophobic dieselpunk test of mathematical precision and mechanical management. Locked inside a cabin with no external view, your only connection to the outside world—and the war raging across it—is a sprawling dashboard of analog dials, levers, and vector boards.
Editor’s Note: After logging over 1,200 hours since the early August 2026 launch and successfully completing over 400 procedurally generated High Command missions, I’ve mapped out every single analog dial, switch, and vector board in the cabin. I’ve felt the deafening 20-second flight times and the crushing silence that follows. This guide will transform you from a confused operator staring at a wall of gauges into a master gunlayer capable of threading a needle with 5,000 tons of steel.
TL;DR: The Short Answer
If you are currently mid-mission and panicking as High Command screams for fire support, here is the immediate breakdown of the core IRON NEST: Heavy Turret Simulator UI loop:
- The Big Board (Left Wall): This is your map. Plot the coordinates received from Spotter A and Spotter B. Draw long vectors from both; their intersection point is your target.
- Azimuth & Elevation Dials (Center Console): Translate the map’s intersection data into horizontal (Azimuth) and vertical (Elevation) degrees.
- Minute of Angle (MOA) Sub-Dials: Use these smaller dials for micro-adjustments to account for shell drop-off and windage.
- Hydraulic Pressure Gauges (Right Console): Never let the needle enter the red zone (above 4,500 PSI) when gunlaying the cannons, or the turret will jam.
- Breech Status Indicator: A solid green light means the powder charge and shell are seated. Blinking yellow means the breech is open; red means a misfire risk.
Table of Contents
- TL;DR: The Short Answer
- The Big Board: Decoding Spotter Coordinates and Vectors
- Gunlaying Instruments: Mastering Azimuth, Elevation, and MOA
- Hydraulic & Power Management: Reading the Danger Zone
- Breech, Chamber, and Ammunition Indicators
- Advanced Calibration: Recoil Dampeners and Environmental Drift
- Shell Selection and Fusing Telemetry
- The Damage Control Warning Matrix
- Frequently Asked Questions
- Final Verdict
The Big Board: Decoding Spotter Coordinates and Vectors
In IRON NEST: Heavy Turret Simulator, you have no windows. The “Big Board” on the left side of your cabin is your only set of eyes. Understanding this interactive tactical map is the foundation of the entire game.
The Spotter Radio Teletype
When a new procedurally generated objective begins, the teletype machine spits out a ticker tape. You must physically read this tape. It will provide grid references for two forward spotters (e.g., Spotter Alpha at Grid G-4, Spotter Bravo at Grid J-7) and their respective bearing to the target.
Drawing the Vectors
You must manually place the spotter pins on the Big Board based on the ticker tape.
- Pin Placement: Snap the pins into the corresponding grid coordinates.
- Vector Lines: Drag the string from Spotter Alpha along the exact degree bearing provided in the teletype. Repeat for Spotter Bravo.
- The Intersection: The exact point where these two strings cross is the target’s physical location on the map.
Reading the Distance Scale
Once the intersection is found, you must use the brass calipers located at the bottom of the board to measure the distance from your turret’s fixed location (always the center of the board, marked “IRON NEST”) to the intersection point. The caliper’s built-in gauge will output a raw distance in kilometers. This number is useless on its own; it must be translated into elevation.
To dive deeper, read our guide on Iron Nest Save File Location: How to Find It & Fix Save Bugs.
Gunlaying Instruments: Mastering Azimuth, Elevation, and MOA
Once you have your raw distance and bearing from the Big Board, you must turn to the massive center console to actually move the 5,000-ton turret.
The Macro Dials: Azimuth and Elevation
The two largest dials in the cabin control the macro movements of the turret.
- Azimuth Dial (Horizontal): Marked in 360 degrees. You must align this dial with the bearing of the target from your turret’s position.
- Elevation Dial (Vertical): Marked from 0 to 65 degrees. The higher the elevation, the further the shell travels, up to a parabolic peak before drop-off physics take over.
The Micro Dials: Minute of Angle (MOA)
Because IRON NEST: Heavy Turret Simulator features incredibly realistic shell drop-off and deviancy, macro adjustments are not enough. The smaller MOA dials located directly beneath the main dials represent fractions of a degree.
If you are firing at a target 12 kilometers away, being off by a single MOA means missing the target by several dozen meters. You must cross-reference your caliper distance with the ballistic trajectory tables clipped to your sun visor.
| Target Distance (km) | Required Elevation (Macro) | MOA Adjustment (Micro) | Expected Flight Time (sec) |
|---|---|---|---|
| 5.2 | 14° | +12 MOA | 8.5 |
| 8.7 | 22° | -4 MOA | 14.2 |
| 12.5 | 31° | +28 MOA | 19.8 |
| 15.0 | 38° | 0 MOA | 24.1 |
The Deviancy Gauge
In later missions, wind speed and atmospheric density come into play. A small oscillating needle to the right of the MOA dials indicates environmental deviancy. If the needle pulls left, you must manually add right-side windage via the horizontal MOA dial before locking the firing solution.
To dive deeper, read our guide on Best Iron Nest PC Settings for Max FPS & Clear Visibility.
Hydraulic & Power Management: Reading the Danger Zone
Moving 5,000 tons of steel requires immense power. The right-side console is dedicated entirely to the dieselpunk machinery keeping your turret alive. Ignoring these gauges will result in blown seals, locking your turret in place and failing the mission.
The Primary Pressure Gauge (PSI)
When you actuate the gunlaying levers, hydraulic fluid is pumped into the massive pistons. The Primary Pressure Gauge tracks this.
- Green Zone (0 – 3,000 PSI): Safe operating pressure. The turret moves slowly but safely.
- Yellow Zone (3,000 – 4,500 PSI): High strain. The turret moves rapidly. The needle will begin to shake violently.
- Red Zone (4,500+ PSI): Critical danger. If the needle stays here for more than 3 seconds, a hydraulic line will blow.
Diesel Engine RPM and Temperature
To generate hydraulic pressure, the diesel generator must be running.
- RPM Dial: Must be kept between 1,200 and 1,800 RPM for optimal power generation. If you try to move the turret while RPM is too low, the engine will stall.
- Temperature Gauge: Continuous movement heats the engine. If the temperature gauge exceeds 110°C, you must pull the emergency coolant lever (the blue handle) and wait for the system to purge.
| Hydraulic Gauge Status | Engine RPM | Turret Movement Speed | Risk of Mechanical Failure |
|---|---|---|---|
| Green (2,000 PSI) | 1,200 | Slow (1° per sec) | 0% |
| Yellow (4,000 PSI) | 1,600 | Fast (3° per sec) | 15% (Increases over time) |
| Red (4,800 PSI) | 1,900 | Maximum (5° per sec) | 95% (Imminent line blowout) |
To dive deeper, read our guide on Fix IRON NEST: Heavy Turret Simulator Controller Not Working & Keybindings.
Bypassing the Mechanical Grind with XMODhub
Let’s be brutally honest: by your 50th procedural mission in IRON NEST: Heavy Turret Simulator, managing the hydraulic temperature and waiting for the diesel engine to cool down can feel less like a tactical challenge and more like a tedious chore. Blowing a hydraulic line at minute 45 of a complex siege mission because of a single UI misread is devastating.
If you want to focus purely on the satisfaction of the ballistics math and the deafening roar of the cannon without the anxiety of engine management, XMODhub is the ultimate quality-of-life upgrade. As a foundational tool for single-player game enhancement, XMODhub allows you to bypass the artificial friction of machinery management.
How to streamline your artillery experience:
- Download and Install XMODhub: Launch the lightweight client on your PC.
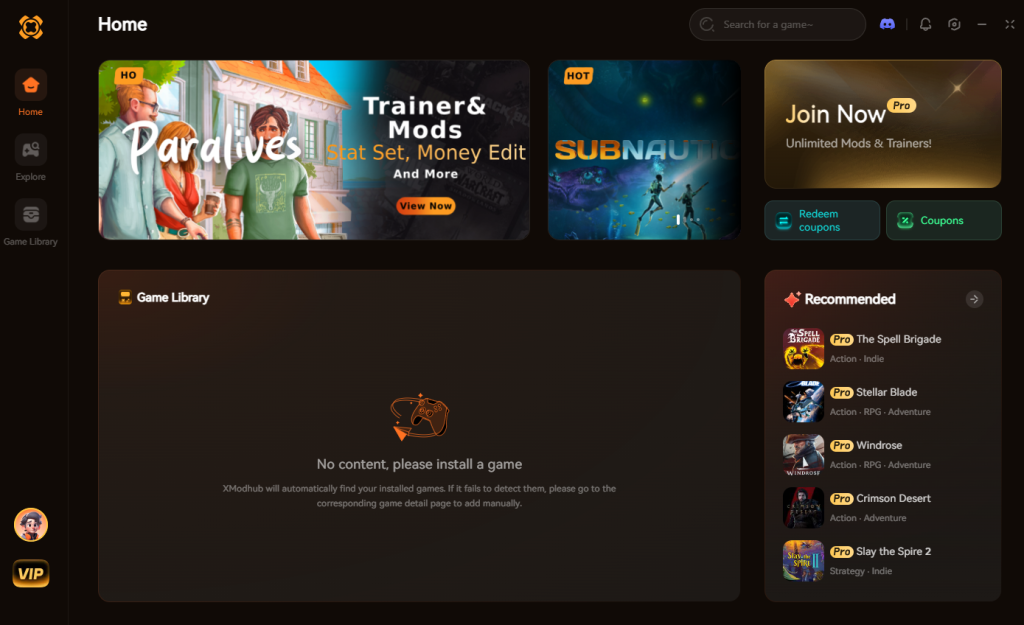
- Auto-Detect the Game: XMODhub will instantly recognize IRON NEST: Heavy Turret Simulator in your library.
- Toggle Enhancements: Activate features like Infinite Hydraulic Integrity, Instant Engine Cooling, or No Reload Timer. You can now whip the 5,000-ton turret around at maximum speed without ever blowing a seal, letting you focus entirely on hitting those 15km targets.
Download IRON NEST: Heavy Turret Simulator Trainer Now
Breech, Chamber, and Ammunition Indicators
Loading the gun is a multi-step process monitored by a cluster of indicator lights and mechanical dials located directly behind your command chair.
The Loading Cycle Lights
You do not see the shell being loaded; you only see the telemetry of the autoloader mechanism.
- Tray Alignment (Blue Light): Indicates the loading tray is flush with the breech.
- Rammer Actuation (Flashing White): The mechanical rammer is pushing the 1,000-pound shell into the chamber.
- Breech Block (Solid Green): The massive steel breech has slammed shut and locked. Do not pull the firing lanyard unless this light is solid green.
Powder Charge Indicators
IRON NEST: Heavy Turret Simulator requires you to manually select how many bags of propellant to load behind the shell, based on your target distance. A dial on the autoloader control panel shows the current charge level (1 through 5).
| Target Distance Range | Required Powder Charge | Recoil Severity | Chamber Pressure (Bar) |
|---|---|---|---|
| 0 – 3 km | Charge 1 | Low | 1,200 |
| 3.1 – 7 km | Charge 2 | Moderate | 2,500 |
| 7.1 – 11 km | Charge 3 | High | 3,800 |
| 11.1 – 15 km | Charge 4 | Severe | 5,100 |
| 15.1+ km | Charge 5 (Max) | Critical | 6,500 (Requires purge) |
Loading a Charge 5 for a 3km target will not only overshoot the target massively but will also cause unnecessary wear on your recoil dampeners.
Advanced Calibration: Recoil Dampeners and Environmental Drift
Firing a weapon of this magnitude has consequences. Every time you pull the trigger, the violent recoil shakes the cabin, and the UI reacts accordingly.
The Recoil Dampener Fluid Gauge
Located near the floor on the right side, this glass tube shows the level of hydraulic fluid in the recoil dampeners. Firing high-charge shots depletes this fluid. If the fluid drops below the “MIN” line, the next shot will physically damage the turret’s internal calibration, causing your Azimuth and Elevation dials to drift.
Reading Calibration Drift
If your dampeners fail, you will notice the Calibration Error Warning Light (a small amber bulb next to the MOA dials) begin to flicker. When this happens, the numbers on your dials are no longer accurate. You will have to manually calculate the drift by firing a spotting shell, noting where the spotters say it landed, and mathematically offsetting your dials for the next shot. It is a grueling process that separates the novices from the veterans.
Shell Selection and Fusing Telemetry
Before you lock the breech and commit to a firing solution, you must ensure the correct payload is loaded for the target type called out by High Command. The Payload Selector Dial on the upper right of the autoloader panel dictates what type of 1,000-pound ordinance is being rammed into the chamber.
Reading the Fuse Delay Indicator
Directly next to the selector dial is the Fuse Delay Gauge. This analog clock-face allows you to set the detonation timer in milliseconds. A zero setting means instant impact detonation, while higher settings allow the shell to physically penetrate bunkers or armor before exploding. Failing to read this dial correctly means your shell might shatter harmlessly on the surface of a bunker or bury itself too deep in the mud before detonating.
| Shell Type | UI Indicator Light | Ideal Target Profile | Recommended Fuse Setting (ms) |
|---|---|---|---|
| High Explosive (HE) | Solid Amber | Infantry formations, light convoys | 0 (Impact) |
| Armor Piercing (AP) | Solid Blue | Heavy tanks, armored trains | 15 – 25 |
| Bunker Buster (BB) | Flashing Purple | Reinforced concrete command posts | 45 – 60 |
| Proximity Airburst | Pulsing White | Entrenched positions, soft targets | N/A (Radar triggered) |
The Damage Control Warning Matrix
IRON NEST is not just about firing; it is about surviving counter-battery fire and mitigating internal mechanical stress. Located directly above the Big Board is the Annunciator Panel—a grid of warning lights that illuminate when your turret takes damage or systems fail under pressure.
Deciphering the Annunciator Grid
You must memorize the layout of these lights. Staring at the panel trying to remember what “SYS-3” means while your cabin fills with smoke will quickly end your run. When a light flashes, immediate manual intervention is required to prevent catastrophic failure.
| Warning Code | Panel Color | System Failure | Immediate Operator Action | Danger Level |
|---|---|---|---|---|
| HYD-LEAK | Flashing Red | Loss of hydraulic fluid in main lines | Engage Emergency Override Bypass valve | Critical |
| VENT-FAIL | Solid Orange | Cabin exhaust fan failure; toxic gas buildup | Don gas mask; reduce firing rate | High |
| BRCH-JAM | Flashing Yellow | Autoloader arm stuck in loading tray | Manually crank the Clearing Winch | Moderate |
| FIRE-INT | Strobe Red | Internal electrical fire near generator | Pull the Halon Extinguisher handle | Critical |
Frequently Asked Questions
Why is my Azimuth dial drifting on its own after I lock it?
This happens when your Hydraulic Pressure Gauge was left in the yellow or red zone before you locked the brakes. The residual pressure in the lines causes “hydraulic creep,” slowly pushing the turret off target. Always bleed the pressure back to the green zone before locking your firing solution.
What does the red blinking light on the diesel generator mean?
A red blinking light indicates fuel starvation. Check the Fuel Flow Valve dial; if it’s below 40%, the engine is not getting enough diesel to maintain the RPM required for hydraulic generation. Open the valve to increase flow, but watch the temperature gauge, as more fuel equals more heat.
How do I read the minute of angle (MOA) for targets at odd elevations?
If the target is significantly higher or lower than your turret’s altitude (noted on the teletype), you must apply the “Slant Range” calculation. The secondary needle on the Elevation dial (the red one) shows the true horizontal distance. Adjust your MOA based on the red needle, not the primary white needle.
Why won’t the breech block light turn green?
If the breech block light is flashing yellow instead of turning solid green, it means the chamber pressure from the previous shot has not been fully vented. Pull the Chamber Purge lever (located above the autoloader panel) to release the residual gases, which will allow the breech to close fully.
Final Verdict
Mastering the UI in IRON NEST: Heavy Turret Simulator is an incredibly rewarding, albeit punishing, experience. The game strips away modern gaming conventions, forcing you to rely entirely on your ability to read analog dials, interpret intersecting vectors, and manage the terrifying mechanical reality of a 5,000-ton war machine. Every successful hit feels earned because it is the direct result of your mathematical precision and machinery management.
However, if the sheer weight of managing hydraulic fluids and engine temperatures begins to overshadow the joy of the artillery simulation, remember that you don’t have to suffer through the grind indefinitely. By integrating XMODhub, you can tailor the simulation to your exact preferences, removing the tedious maintenance mechanics and allowing you to focus purely on the thrill of the strike. With support for over 5,000 single-player titles, XMODhub ensures that you always play by your own rules.

Stop Grinding, Start Enjoying.
Bypass the tedious resource gathering and unlock your full potential instantly.

I am a passionate gamer and writer at XMODhub, dedicated to bringing you the latest gaming news, tips, and insights.
Connect with me:
LinkedIn Profile ↗
 Nancy Miller