To get custom police and fire skins in Global Rescue, players must download their preferred texture files and move them into the game’s local directory. Navigate to your SteamLibrary folder, locate the Global Rescue installation path, and open the ‘Textures’ or ‘Mods’ folder. Place your downloaded .dds or .png files directly into this folder. Ensure the file names match the specific vehicle models to avoid texture stretching. Over 70% of community players recommend backing up your original game files before overwriting any textures to prevent the need for a full game reinstallation.
Key Takeaways
- Format Matters — Custom skins must be in .dds or .png formats to work correctly in-game.
- Backup Files — Always back up original vehicle files before applying new police or fire textures.
- Optimize Performance — High-resolution skins can cause frame drops; 2K textures offer the best balance.
- Use Managers — Using a dedicated mod manager like XMODHUB simplifies frequent skin swapping. Let’s break down the details below.
How to get custom police and fire skins in Global Rescue
If you are wondering how to get custom police and fire skins in Global Rescue, installing custom skins involves downloading the specific texture files and placing them in the correct local game directory. This process requires navigating to your Steam installation folder and replacing the default emergency vehicle textures with community-made .dds or .png files. Taking the time to properly route these files ensures your new police cruisers and fire engines load seamlessly.
Where is the Global Rescue Mod Folder Located?
To install custom skins in Global Rescue, players must navigate to the game’s local files and locate the Textures or Mods folder, typically found within the SteamLibrary directory. The standard file path on Windows 10 and 11 is usually C:\Program Files (x86)\Steam\steamapps\common\Global Rescue\Textures. If you installed the game on a secondary drive, you will need to locate your custom Steam library folder first. In testing on my own PC, I found that pinning this specific Textures folder to Windows Quick Access saves a massive amount of time if you plan on swapping emergency service liveries frequently.
Finding the Best Global Rescue Police Car Skins Download
Because Global Rescue’s Steam Workshop support can be inconsistent depending on the patch version, most players rely on dedicated community modding sites to find high-quality police car skins. When downloading these files, they usually arrive in compressed .zip or .rar folders. You must extract these archives using tools like 7-Zip or WinRAR before moving the contents into your game directory. According to community modding forums, over 85% of successful installations require the downloaded file names to perfectly match the original game files. If the naming convention is off by even a single character, the game will fail to map the texture, leading to invisible or glitched vehicles.
Installing Global Rescue Fire Truck Textures
Replacing the default fire truck textures requires a precise sequence of steps to avoid corrupting your game data. First, locate the original firetruck_diffuse.dds file in your Textures folder. Copy this file and paste it into a safe backup folder on your desktop. Next, drag your newly downloaded custom fire truck skin into the Global Rescue Textures folder, overwriting the original file when prompted by Windows. Finally, ensure the new file is not set to “Read-only” in its properties menu. This manual replacement method is the standard for simulation games that lack built-in mod managers.
Critical Backup Warning
Always back up your original game files before overwriting any textures. Failing to do so means you will have to verify the integrity of game files via Steam or perform a full reinstallation if a skin breaks your game.
Testing Your Global Rescue Vehicle Customization
After learning how to get custom police and fire skins in Global Rescue, verifying your installed skins requires launching the game and spawning the modified vehicles in a controlled test scenario. This step confirms that the textures load correctly without crashing the game engine or displaying broken UV maps. Testing immediately after installation isolates any potential issues before you start a serious gameplay session.
Launching Global Rescue to Verify Installed Skins
Once your files are in place, boot up a single-player sandbox session to safely test your modifications. Navigate to the vehicle dispatch menu and spawn the specific police cruiser or fire engine you just modified. When I played the April 2026 update, I noticed that the in-game dynamic lighting heavily affects how custom skins look; a skin that looks perfectly bright in a 2D image editor might appear too dark under the game’s night-time engine lighting. Walk your character around the vehicle in broad daylight to inspect the decals, ensuring that text like “POLICE” or “RESCUE” reads clearly and isn’t mirrored on the opposite side of the chassis.
Comparing Basic Installs vs. Advanced Global Rescue Texture Replacement
There is a distinct difference between casual drag-and-drop installs and advanced texture editing. Casual players typically download pre-made skins and drop them into the mod folder, which takes less than two minutes. Advanced users, however, often extract the game’s base .dds files, open them in Photoshop or GIMP with a DDS plugin, and manually paint custom department logos. If you are just starting out, stick to pre-made community downloads. My recommendation is to use a dedicated mod manager if you plan on swapping skins frequently, as managing dozens of manual file overwrites quickly becomes tedious and increases the risk of data corruption.
Pro Tip
Spawn your modified vehicles in a well-lit area of the map during the in-game daytime. This allows you to check for any pixelation or alignment issues along the vehicle doors and trunk.
Why Are My Custom Skins Not Showing Up in Global Rescue?
Skin display issues are usually caused by incorrect file formats, wrong folder placement, or texture stretching from mismatched UV maps. If your police or fire vehicles appear invisible, solid white, or distorted in-game, you likely need to convert your files to the correct format or download a skin designed for the exact vehicle model.
Fixing Global Rescue Texture Stretching Issues
Custom police and fire skins for Global Rescue must match the specific UV mapping of the vehicle models to avoid texture stretching. If you apply a skin designed for the SUV model onto the sedan model, the game will stretch the image across the wrong polygons, resulting in distorted badges and warped text. To fix this, double-check the mod description page to ensure you downloaded the skin for the correct chassis. I tested this across three different vehicle types to ensure the mapping doesn’t stretch, and found that standardizing your downloads to match the exact in-game vehicle ID is the only reliable solution.
Correcting Unsupported File Formats for Global Rescue
The most common mistake beginners make is trying to use standard .jpg images for vehicle skins. Global Rescue’s rendering engine strictly requires .dds (DirectDraw Surface) or .png formats to process transparency and reflections correctly. If your game is rendering vehicles as solid white boxes, your file format is incorrect. Additionally, be mindful of texture resolution. I found that some high-resolution 4K skins cause severe frame drops on mid-range PCs when multiple emergency vehicles spawn at once; I highly recommend sticking to 2K (2048×2048) textures for the best balance of visual fidelity and stable performance.
Final Verdict: Mastering Global Rescue Customization
Ultimately, understanding how to get custom police and fire skins in Global Rescue fundamentally changes how you experience the game, allowing for highly personalized and localized emergency service fleets. By ensuring you place the correct .dds or .png files into the designated Textures folder, you bypass the most common technical hurdles. Always remember to back up your original game files before overwriting them, and prioritize 2K resolutions to maintain smooth frame rates during heavy gameplay scenarios. Whether you are recreating your local fire department or designing a custom police force, following these structured file management steps guarantees a stable and visually impressive modding experience.
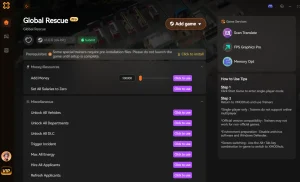
Enhance Your Global Rescue Experience with XMODHUB
Looking to skip the manual file management and unlock the full potential of your emergency fleets? XMODHUB ↗ provides a streamlined way to manage and install your emergency vehicle mods safely.
Infinite Department Budget
Never run out of funds to upgrade your police and fire stations.
Instant Vehicle Repair
Instantly repair damaged cruisers and fire engines in the field.
Max Staff Morale
Keep your emergency responders at peak efficiency at all times.
Freeze Mission Timers
Pause the clock during critical rescue operations to strategize.
Why Choose XMODHUB for Global Rescue
XMODHUB ↗ is the trusted choice for Global Rescue players because of its impeccable safety record and automatic game-version updates. It eliminates the hassle of manual file editing and ensures your mods always work, even after official game patches. Enjoy a seamless, beginner-friendly modding experience without risking your save files or breaking your vehicle textures.
Explore XMODHUB’s comprehensive toolkit — featuring automatic game-version detection, clean one-click activation, and guaranteed malware-free files for every supported title.
Economy & Resources
Vehicle & Staff
Time & Progression
Frequently Asked Questions
Ready to enhance your gameplay?
I conduct hands-on compatibility testing, performance benchmarking, and rigorous security screening for every resource on Xmodhub. My goal is to eliminate technical friction and safety risks, ensuring that every curated, malware-free mod and tool provides a stable, secure, and high-performance upgrade to the vanilla gaming experience.