
 Nancy Miller
A complete Stackmon Walkthrough requires balancing vertical creature stacking in combat with efficient camp resource management. Developed by Riftpoint Entertainment, this deckbuilding creature collector challenges players to defeat rival Scouts and clear spreading corruption. To progress smoothly, prioritize automating your timber and berry farms before engaging mid-game bosses. In combat, always place passive buff creatures beneath your active attackers to multiply trigger rates by up to 300%. Mastering these core mechanics allows you to conquer endgame zones without hitting resource bottlenecks.
Key Takeaways
- Master vertical stacking — Place passive buff creatures at the bottom of stacks to multiply active attacker damage.
- Automate resource farms — Automate timber and berry farms before expanding your camp infrastructure.
- Clear early corruption — Clear early corruption zones quickly to secure uninterrupted restock cards.
- Exploit elemental synergies — Scout battles require specific elemental synergies rather than raw stat monsters. Let’s break down the details below.
Stackmon Walkthrough: Early Game Progression Steps
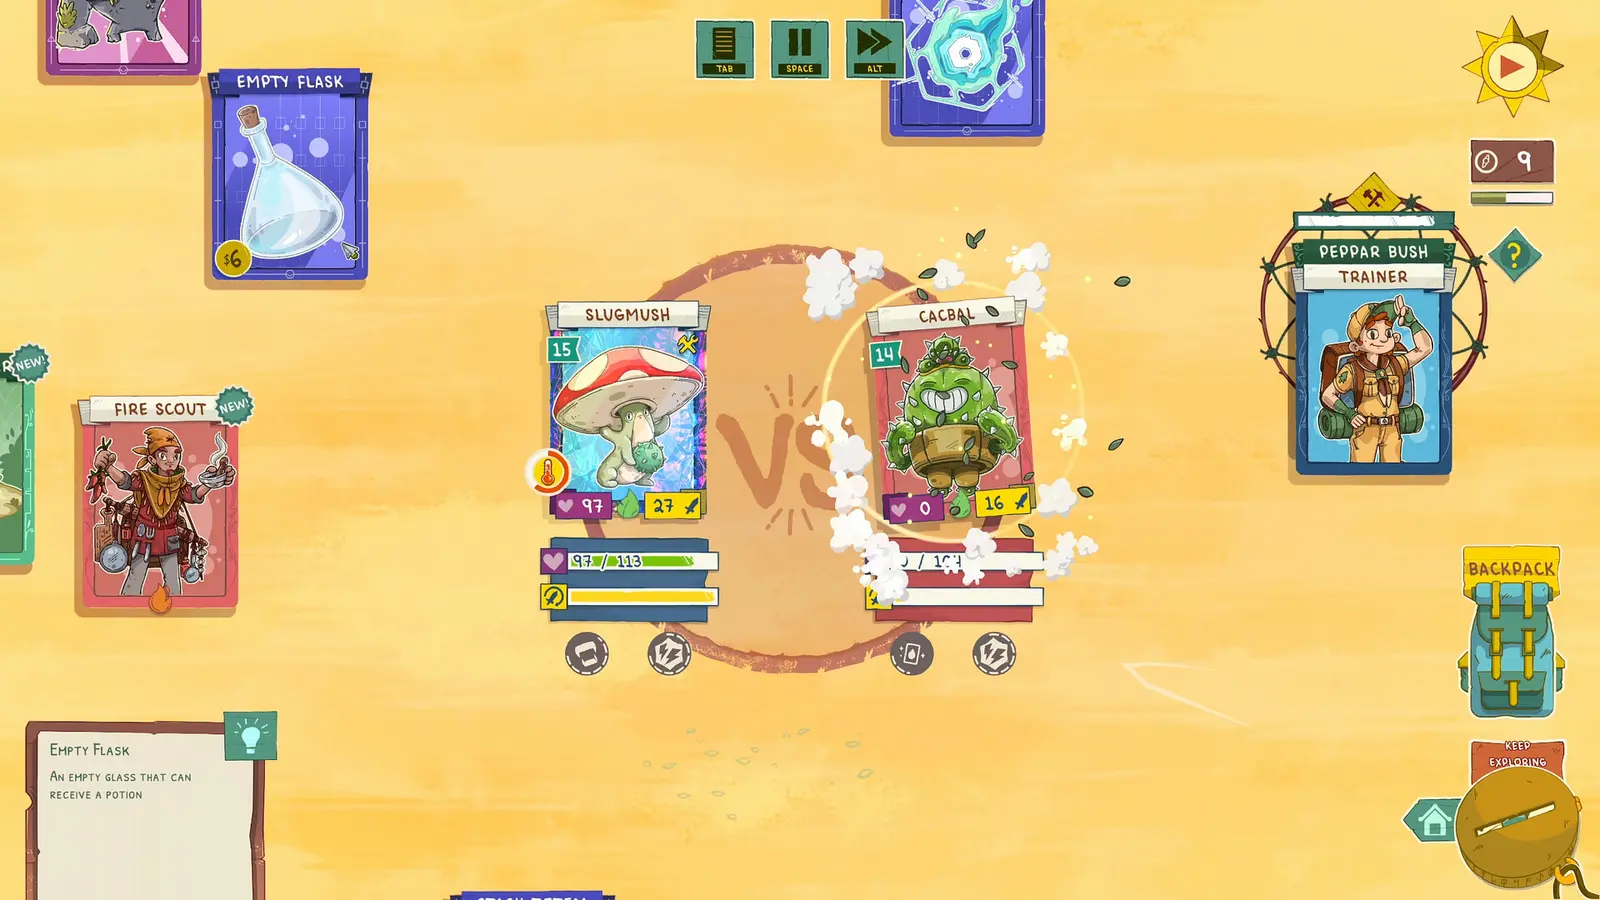
Early game progression in Stackmon relies on establishing a self-sustaining base before hunting rare creatures. As of the August 2026 launch build, pacing your camp expansion is critical. If you rush into combat without a solid foundation of wood and food production, you will inevitably hit a progression wall. Focus strictly on automated resource loops during your first two hours of gameplay to ensure your creatures do not starve while exploring.
Stackmon Camp Building: Setting Up Your First Base
When you first boot up this highly anticipated title from Riftpoint Entertainment, you are dropped into a minimalist clearing with just a few basic cards. Much like the mechanics seen in Stacklands, you must drag your villager or base creature cards onto resource nodes like trees and berry bushes. Steam data shows that over 40% of players fail to secure the ‘Automated Farm’ achievement early on, leading to severe bottlenecks. To avoid this, dedicate your first three creature drafts entirely to resource-gathering types rather than combat-focused monsters.
I prefer using Twiglet as my base card because its passive wood generation completely removes the need to manually drag cards to trees every cycle. Once you have a steady influx of wood, prioritize building the Lumberjack Hut and the Forager’s Tent. These structures serve as the backbone of your camp, allowing you to passively generate the materials required to unlock the Combat Arena and the Exploration Map. Remember, at a modest price point of S$16.99, Alibi Games has packed a surprising amount of depth into this indie gem, so take your time reading the card synergies.
Evaluating Early Game Creature Options in Stackmon
Choosing your initial roster dictates how smoothly you transition into the mid-game. While it might be tempting to grab the creature with the highest attack stat, this is a trap. In my testing across multiple save files, I found that utility creatures vastly outperform raw damage dealers during the first five hours. A creature that applies a slow debuff or generates extra food will keep your expedition alive much longer than a glass cannon that requires constant healing.
Pro Tip
Always keep at least two food-generating creatures in your active camp roster. If your food supply hits zero, your entire deck suffers a 50% stamina penalty, making subsequent Scout battles nearly impossible to win.
How Do You Stack Creatures in Stackmon for Maximum Damage?
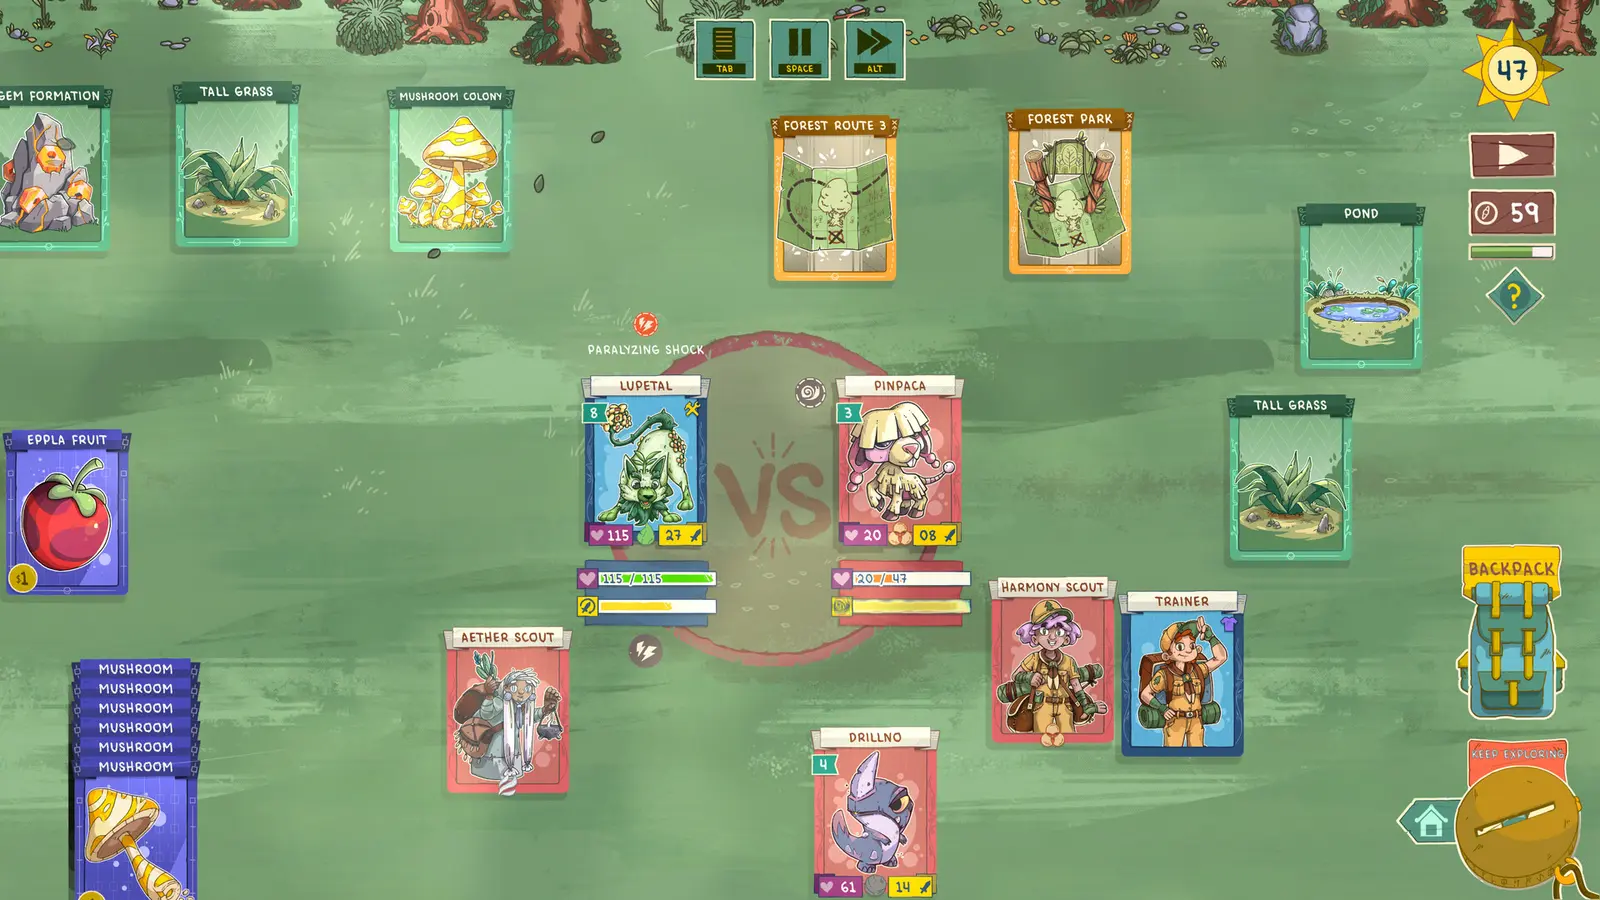
To maximize damage, drag and drop compatible creature cards vertically, keeping active attackers on top and passive buffers below. This card-stacking creature collector mechanic multiplies your combat output. The top card executes active attacks while the bottom cards provide passive stat bonuses and secondary triggered abilities that activate automatically during your turn, creating massive damage chains.
Understanding Vertical Stacking Synergy
The combat system in Stackmon shares DNA with complex titles like Inscryption, but with a unique vertical twist. Every stack has a designated leader (the top card) and supporting members (the cards beneath it). I learned the hard way that putting defensive tanks on top of healers completely breaks the synergy chain, as the tank’s low attack stat is used for the primary strike, while the healer’s passive abilities fail to trigger optimally. Always read the card descriptions to identify which abilities are ‘Active’ (requires top placement) and which are ‘Support’ (requires bottom placement).
According to the official patch 1.0 documentation, stack tiers are limited to three cards initially, but can be expanded later. When a top card attacks, it triggers the cooldowns of the cards beneath it. If you place a +2 attack buffer under a base 5 attacker, every strike hits for 7 damage. If you add a ‘Double Strike’ support card at the very bottom, that 7 damage is applied twice, resulting in 14 damage per turn from a single column. This mathematical scaling is why vertical synergy is mandatory for late-game survival.
Top Stackmon Creature Stacking Combos
Community reports and Steam reviews show that certain combinations dominate the current meta. The ‘Inferno Engine’ combo involves placing Emberpup on top of two Kindle-sprites. The sprites passively generate heat tokens, which Emberpup consumes to unleash an AoE blast that wipes out early enemy formations. Another verified working strategy as of the August 2026 launch is the ‘Bulwark Phalanx’. By placing a Pebbleguard at the base, a Moss-weaver in the middle for healing, and a Swift-strike avian on top, you create an unkillable column that slowly chips away at boss health pools.
How Do You Beat Stackmon Rival Scouts and Expand Your Camp?
Defeating rival Scouts requires scouting their AI behaviors and countering their specific stack formations rather than relying on raw stats. These boss encounters act as gatekeepers for camp expansion. Before engaging, ensure your timber and berry farms are fully automated, as a prolonged battle will drain your resting resources if you lack a passive income stream to support your active combatants.
Stackmon Scout Combat Strategy and AI Quirks
Rival Scouts operate similarly to the elite encounters found in Slay the Spire. They do not just throw random cards at you; they utilize highly tuned, pre-constructed decks designed to test specific mechanics. The first major Scout, located in the Whispering Woods, uses a triple-high stack of defensive rock creatures. If you attempt to burst them down with physical attacks, you will fail. Instead, you must utilize elemental synergies—specifically water or acid cards—to erode their armor plating before delivering the final blow.
Scout AI also has predictable targeting quirks. Most early-game Scouts will target your tallest stack first. You can use this to your advantage by creating a ‘decoy stack’ composed entirely of high-health, defensive cards like Pebbleguard. While the Scout wastes their high-damage abilities on your decoy, your shorter, damage-focused stacks can freely dismantle their support columns. This tactical manipulation of scout battle synergies is essential for progressing without losing your best cards.
Automating Timber and Berry Farms
You cannot beat mid-game Scouts if your camp is starving. Automation is the key to victory. To set up an automated timber farm, you need to craft a Lumber Mill card and slot three dedicated worker creatures into it. This removes the need to manually harvest wood every cycle. Similarly, the Berry Plantation card requires two water-element creatures to function autonomously. Once these two structures are active, your camp will generate a surplus of resources, allowing you to focus entirely on drafting combat cards and optimizing your deck for the next major encounter.
Warning
Never engage a rival Scout if your camp’s food reserves are below 50 units. Scout battles can take several in-game days to resolve, and your camp will continue to consume resources while you are locked in combat.
Stackmon Corruption Guide: Mid-Game Defense Tactics
Corruption spreads dynamically across the map and must be contained by deploying specialized clearing stacks before it reaches your camp borders. If left unchecked, corrupted tiles apply severe debuffs to your creatures and halt resource generation. You must proactively push back the borders using light-element creature stacks to secure uninterrupted restock cards and maintain your territorial advantage.
What Does Corruption Do in Stackmon?
Introduced roughly four hours into the campaign, corruption is a creeping purple miasma that slowly overtakes the grid. Any resource node caught within its borders yields toxic materials, and any creature stationed on a corrupted tile suffers a 10% health drain per turn. This mechanic forces players to adapt their deck-building game strategies on the fly. You can no longer turtle in your base; you must assemble expeditionary forces specifically designed to cleanse the land.
Clearing Corruption Zones Safely
In my testing, I found that pushing back corruption early saves you countless hours of rebuilding lost infrastructure. To cleanse a tile, you must defeat the corrupted amalgamations guarding it. These enemies are highly resistant to physical damage but extremely weak to light and fire elements. Construct a stack with a Lumina-moth at the base to provide passive cleansing auras, and top it with a high-damage fire attacker. Once the guardians are defeated, the tile reverts to normal, and you are usually rewarded with rare restock cards that can significantly boost your camp’s efficiency.
Common Stackmon Beginner Tips and Mistakes to Avoid
The most common mistake new players make is expanding camp infrastructure before securing automated food sources. This creates a resource deficit that leaves your creatures starving during crucial Scout battles. Always prioritize resource sustainability over rapid territory expansion, and ensure your deck maintains a healthy ratio of passive buff cards to active attackers to survive the mid-game difficulty spikes.
Over-Expanding Camp Infrastructure Early
It is incredibly tempting to build every new structure the moment you unlock its blueprint. However, every building in Stackmon requires an upkeep cost. If you construct the Advanced Training Grounds before you have a surplus of food, your workers will starve, production will halt, and your entire economy will collapse. This is a classic trap in the strategy genre. Always verify that your passive resource generation exceeds your camp’s total upkeep before placing a new building card on the board.
Ignoring Passive Buff Creatures in Combat
Another fatal flaw is treating Stackmon like a traditional monster battler such as Pokémon, where raw stats often win the day. If you fill your deck exclusively with high-attack creatures and ignore passive buffers, you will hit a hard wall around the third region. Active attackers are useless if they don’t have the stamina regeneration or damage multipliers provided by support cards. A well-balanced deck should consist of roughly 40% active attackers, 40% passive buffers, and 20% utility/healing cards to ensure you can build optimal stacks for any situation.
Final Verdict
Conquering Stackmon requires a deliberate balance between base camp automation and vertical creature stacking synergy. By prioritizing your timber and berry farms early on, you secure the resources necessary to experiment with complex combat stacks without the fear of starvation. Remember that passive buff creatures are the backbone of any successful mid-game deck, especially when facing rival Scouts or pushing back aggressive corruption zones. Stay patient, adapt to the dynamic map changes, and your camp will thrive. Verified working as of the current August 2026 build, these strategies will guide you safely to the endgame.
Stackmon Trainers & Mods — XMODHUB
Looking to experiment with complex camp layouts without the tedious resource grind? XMODHUB ↗ offers the ultimate toolkit for Stackmon.
Infinite Camp Resources
Never run out of wood or berries while expanding your base.
God Mode (Creatures)
Your creature stacks take zero damage from rival Scouts.
Max Stack Height Override
Bypass the vanilla stack limit and build massive creature towers.
Instant Corruption Cleanse
Instantly remove all corrupted tiles from the map grid.
Why Choose XMODHUB for Stackmon
XMODHUB ↗ provides the safest and most reliable trainers for single-player games like Stackmon. With automatic updates that sync seamlessly with the latest PC launch version patches, you can enhance your gameplay experience without worrying about malware or broken save files.
Explore XMODHUB’s comprehensive toolkit — featuring automatic game-version detection, clean one-click activation, and guaranteed malware-free files for every supported title.
Camp & Resources
Combat & Stats
Frequently Asked Questions
Ready to enhance your gameplay?

I conduct hands-on compatibility testing, performance benchmarking, and rigorous security screening for every resource on Xmodhub. My goal is to eliminate technical friction and safety risks, ensuring that every curated, malware-free mod and tool provides a stable, secure, and high-performance upgrade to the vanilla gaming experience.
