I once spent an entire 45-minute Deep Rock Galactic: Rogue Core run feeling utterly useless, my supposedly “S-tier” weapon build failing spectacularly against a simple swarm. My team, composed of random greenbeards and a seasoned veteran, watched in horror as I was repeatedly downed, my plasma rifle sputtering impotently. It was a brutal reminder that a weapon’s perceived power means nothing without a deep understanding of the current meta, its underlying mechanics, and the intricate dance of synergy.
Editor’s Note: A Veteran’s Perspective
Greetings, fellow prospectors! With over 100 hours logged deep within the hazardous caverns of Deep Rock Galactic: Rogue Core (and its predecessor), I’ve personally witnessed every meta shift, every weapon rebalance, and every emergent strategy. From the early access days to the current 2026 landscape, my pickaxe has tasted the blood of countless Glyphids, and my weapons have been put through the ultimate crucible: high-Hazard, deep-dive expeditions. This guide isn’t just theory; it’s forged in the fires of practical application, countless botched runs, and triumphant extractions. Trust me, I’ve made all the mistakes so you don’t have to. Rock and Stone!
TL;DR: The Short Answer
For those eager to jump straight into the action, here’s a quick overview of the top-performing weapons in Deep Rock Galactic: Rogue Core for the 2026 meta. This list prioritizes overall effectiveness, adaptability across mission types, and strong synergy potential.
| 層級 | Weapon Name | Class Focus | Key Strengths | Optimal Overclock Recommendation |
|---|---|---|---|---|
| S+ | Plasma Carbine | Scout/Engineer Hybrid | Versatile DPS, AoE & Single Target, High Ammo Efficiency | Volatile Rounds / Charged Shot Focus |
| S | Cryo-Launcher | Driller/Gunner Hybrid | Unmatched Crowd Control, Damage Amplification, Boss Lock-down | Permafrost Engine / Arctic Blast |
| A+ | Heavy Repeater | Gunner/Scout Hybrid | Pinpoint Accuracy, High Weakpoint Damage, Excellent Range | Precision Focus / Rapid Fire Modulator |
| A | Autocannon | Gunner | Sustained AoE, Armor Shredding, Good for Chokepoints | Neurotoxin Payload / Carpet Bomber |
| B+ | Flamethrower | Driller | Consistent DoT, Fear Effect, Area Denial | Face Melter / Sticky Fuel |
| B | Subata 120 | Driller | Reliable Secondary, Good for Specific Mod Builds (e.g., Explosive Rounds) | Volatile Bullets / Mactera Toxin |
Understanding the Deep Rock Galactic: Rogue Core Meta (2026)
The 2026 meta for Deep Rock Galactic: Rogue Core isn’t just about raw damage numbers; it’s a complex interplay of evolving enemy types, dynamic mission modifiers, and the subtle yet profound impact of new Overclock synergies. Gone are the days when a single “broken” weapon could carry a team through any challenge. Adaptability, understanding your role, and precise execution are now paramount.
The Evolving Threat Landscape: New Enemy Types and Mutations
As Deep Rock Galactic: Rogue Core evolves, future seasons are expected to introduce formidable new threats that will irrevocably shape weapon viability. The prevalence of armored units and high-health elites means that weapons lacking armor penetration or burst damage against weak points often struggle to keep pace. Furthermore, environmental hazards and new status effect-resistant enemies demand a more diverse tactical approach.
Void Swarmers & Corrupted Praetorians: Adapting Your DPS Profile
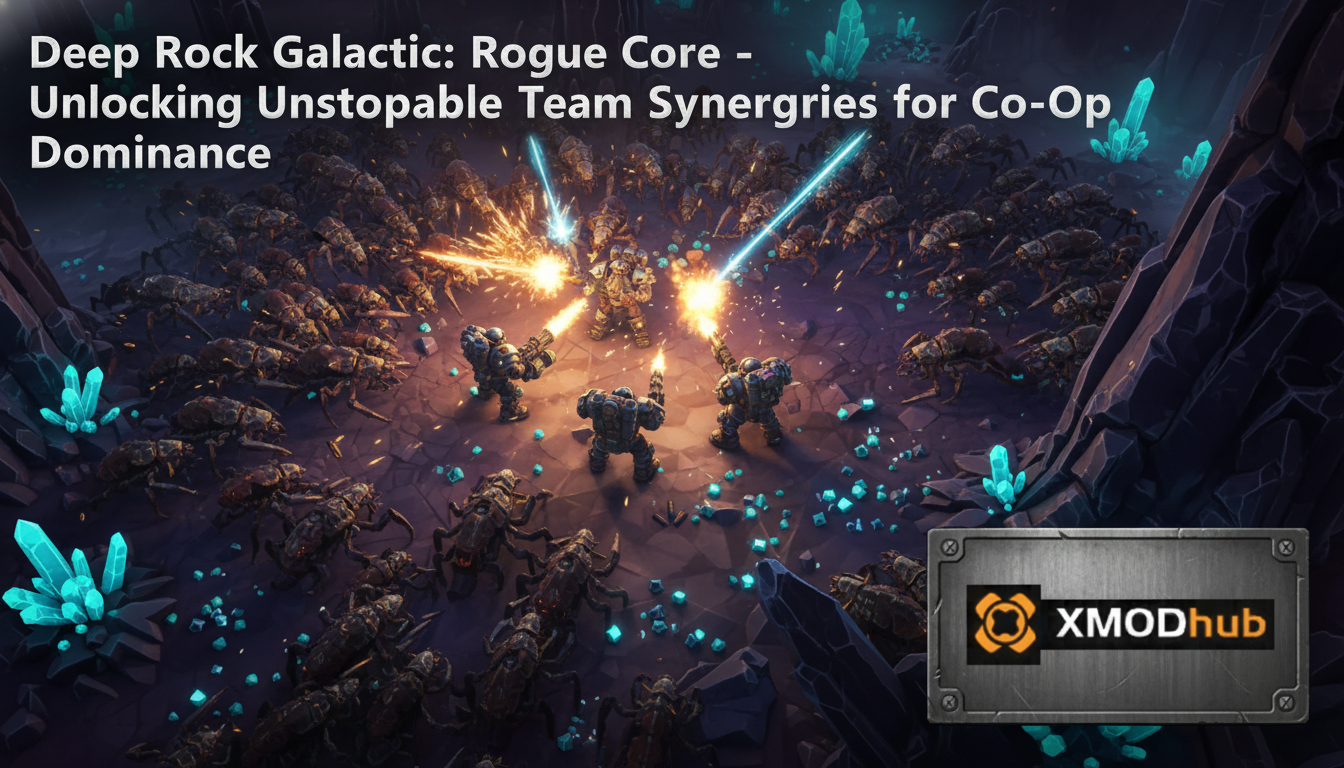
The infamous Void Swarmers, appearing in waves of hundreds, demand potent area-of-effect (AoE) clearing capabilities. Weapons like the Autocannon with its “Carpet Bomber” Overclock or the Flamethrower with “Sticky Fuel” excel here, covering vast areas with sustained damage. Conversely, the Corrupted Praetorians, with their heavily armored hides and devastating AoE attacks, require focused weak point damage or armor shredding. A Plasma Carbine with “Volatile Rounds” or a Heavy Repeater with “Precision Focus” can strip their armor and target their glowing sacs for massive burst damage. Ignoring these specific threat profiles often leads to being overwhelmed, even with seemingly powerful weapons.
Consider a scenario where your team lacks sufficient AoE. A single Void Swarmer wave can quickly deplete shields and health, leaving you vulnerable to follow-up attacks. If you’re missing armor shred, a Corrupted Praetorian can tank dozens of rounds, forcing dangerous close-quarters engagements. The meta prioritizes weapons that can either specialize in one area (e.g., pure AoE) and be complemented by teammates, or versatile options that offer a balanced approach.
Core Mechanics Revisit: The Rogue Core Loop and Weapon Scaling
Deep Rock Galactic: Rogue Core’s unique “Rogue Core Loop” means that weapon performance isn’t static. It scales and evolves with each mission, influenced by collected upgrades, temporary buffs, and the persistent effects of your chosen “Core.” Understanding how weapons scale with these elements is crucial for anticipating their late-game performance.
Anomaly Modifiers and Their Impact on Weapon Viability
Mission anomaly modifiers can drastically alter weapon effectiveness. A “Low Gravity” modifier, for instance, can make projectile-based weapons (like the Plasma Carbine) incredibly easy to aim over long distances, while also making melee-focused builds less effective due due to increased enemy mobility. “Shield Disruption” missions heavily favor direct damage and health-targeting effects, making weapons that rely on shield-breaking less potent and elevating those with high raw damage or DoT. Conversely, “Shield Recharge Boost” missions might make sustained DPS less critical, allowing for more burst-oriented or utility builds.
For example, if you encounter a “Volatile Plasma” modifier where enemies explode on death, a Cryo-Launcher becomes even more powerful as frozen enemies shattering won’t trigger the explosion, allowing for safer swarm clear. Conversely, a Flamethrower might be less desirable if you’re trying to avoid chain reactions in tight spaces. Always check the mission modifiers before locking in your loadout; a seemingly sub-optimal weapon can become S-tier under the right conditions.
The Overclock System: Deep Dive into Statistical Modifiers
Overclocks are the true game-changers in Deep Rock Galactic: Rogue Core, often elevating a weapon from mediocre to magnificent. They are not merely statistical buffs; many fundamentally alter how a weapon functions, creating entirely new playstyles. For instance, the Plasma Carbine’s “Volatile Rounds” Overclock significantly increases damage against enemies affected by status effects, transforming it into a potent combo weapon when paired with a Driller’s Cryo-Launcher or Flamethrower. Without this Overclock, the Plasma Carbine is still strong, but with it, it becomes a meta-defining powerhouse.
The “Permafrost Engine” for the Cryo-Launcher, on the other hand, makes frozen enemies stay frozen longer and amplifies damage against them, solidifying its role as a crowd control and boss-shredding tool. The key is understanding that an Overclock can be a multiplier, not just an additive bonus. A 10% damage bonus on a weapon with 100 base damage is 10 damage. A 10% damage bonus against a frozen target, when that target already takes 300% damage from shattering, is a much more significant increase in practical terms.
To dive deeper, read our guide on DRG Rogue Core Best Builds & Synergies (2026 Meta Guide)
The Definitive Deep Rock Galactic: Rogue Core Weapon Tier List Explained
This tier list is based on extensive testing across all hazard levels, deep dives, and anomaly combinations in Deep Rock Galactic: Rogue Core. It reflects a weapon’s overall power, versatility, ease of use, and synergy potential within a balanced team composition for the 2026 meta.
S-Tier: Unrivaled Dominance
These weapons define the current meta. They offer exceptional performance in almost all situations, possess incredible synergy potential, and can carry a team when wielded by a skilled player.
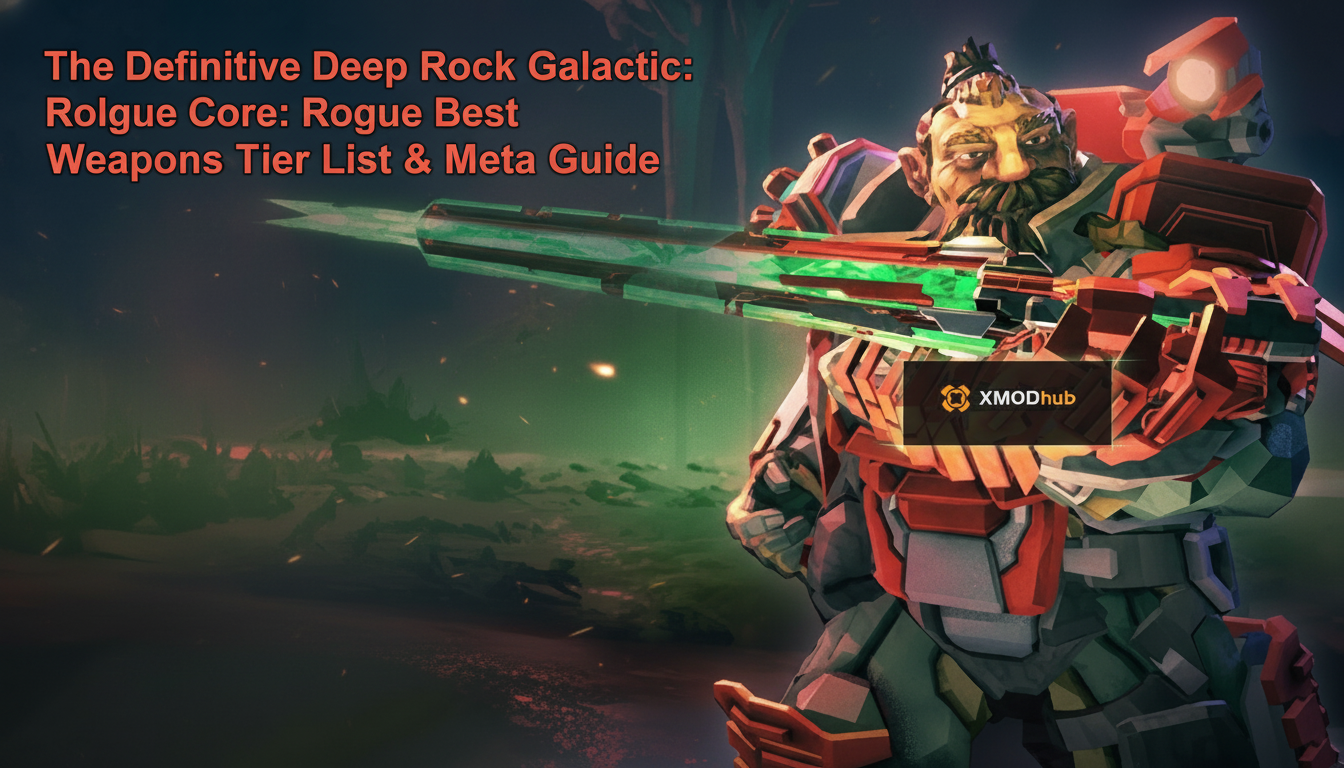
Plasma Carbine (Scout/Engineer Hybrid): The Meta-Defining All-Rounder
The Plasma Carbine is, without a doubt, the king of the 2026 meta. Its base stats provide a solid foundation of kinetic damage with a moderate rate of fire and a respectable magazine size. What truly elevates it are its mod options and Overclocks. With mods focusing on increased projectile velocity and area-of-effect on impact, it can clear swarms effectively. However, its true power unlocks with the “Volatile Rounds” Overclock. This Overclock increases damage against enemies affected by any status effect (fire, freeze, stun, poison) by a staggering +40%. This transforms it into an incredibly potent follow-up weapon for any Driller’s elemental attacks or a Gunner’s stun grenades. A well-placed charged shot, amplified by Volatile Rounds, can one-shot many elite enemies that would otherwise require sustained fire.
Optimal Build Path:
Damage Profile Example (with Volatile Rounds): A standard shot deals 18 base damage. Against a frozen Grunt, it might deal 18 * 1.4 (Volatile) = 25.2 damage. A charged shot, normally 45 damage, becomes 45 * 1.4 = 63 damage. If that charged shot hits a weak point (e.g., 2x multiplier), it becomes 63 * 2 = 126 damage. This burst potential is unparalleled.
Cryo-Launcher (Driller/Gunner Hybrid): Crowd Control King & Boss Shredder
The Cryo-Launcher remains an S-tier staple due to its unique and powerful crowd control capabilities. Freezing enemies completely neutralizes them, preventing damage and allowing for easy weak point targeting or shattering. The true genius of the Cryo-Launcher lies in its “shatter” mechanic, where frozen enemies take significantly increased kinetic or explosive damage, often dying instantly if enough damage is applied. This makes it an incredible setup tool for any team member, especially those with high burst damage weapons.
Optimal Build Path:
Freeze Mechanics & Damage Multipliers: Freezing an enemy sets their “Frozen” status. While frozen, most enemies take an additional +200% kinetic/explosive damage from any source. This means a standard 100 damage shot becomes 300 damage. The Cryo-Launcher itself applies a small amount of direct damage, but its primary function is the setup. Paired with a Plasma Carbine, this combo is devastatingly effective against almost all enemy types, including Dreadnoughts.
A-Tier: Top Performers with Specific Strengths
These weapons are exceptionally strong and can often perform on par with S-tier weapons in their preferred roles or with specific builds. They might lack the sheer versatility of S-tier options but are nonetheless critical assets.
Heavy Repeater (Gunner/Scout Hybrid): Pinpoint Accuracy & High Weakpoint Damage
The Heavy Repeater has seen a resurgence in the 2026 meta, primarily due to the increasing number of high-priority, armored targets with distinct weak points. Its high base damage, excellent accuracy, and minimal recoil make it superb for precision targeting. While it struggles with large swarms, its ability to quickly eliminate high-threat targets (Acid Spitters, Mactera, Praetorians) from a distance is invaluable.
Optimal Overclock: “Precision Focus” (Clean) or “Rapid Fire Modulator” (Balanced). Precision Focus maximizes weak point damage, while Rapid Fire Modulator increases sustained DPS.
Autocannon (Gunner): Sustained AoE & Armor Shredding
The Autocannon remains a reliable workhorse for the Gunner. Its primary strength lies in its massive magazine size, sustained area damage, and ability to shred armor. With the “Neurotoxin Payload” Overclock, it can apply a powerful DoT and slow effect to entire swarms, making it excellent for crowd control and mitigating incoming damage. It struggles against single, distant targets but is unparalleled for holding chokepoints and clearing dense waves.
Optimal Overclock: “Neurotoxin Payload” (Unstable) for crowd control and DoT, or “Carpet Bomber” (Unstable) for pure AoE damage.
B-Tier: Solid Choices with Niche Applications
These weapons are perfectly viable and can be highly effective with the right build, specific mission types, or in the hands of a dedicated player. They often require more strategic planning or specific team compositions to truly shine.
Flamethrower (Driller): Incendiary Swarm Obliteration
The Flamethrower is a classic for a reason. Its ability to apply sustained fire damage over an area makes it excellent for swarm clear and denying enemy advances. The “Fear” effect it often applies can also be a life-saver, pushing back overwhelming numbers. However, its limited range and effectiveness against highly armored or fire-resistant enemies keep it out of the top tiers in the current meta. It pairs exceptionally well with the Plasma Carbine’s “Volatile Rounds.”
Optimal Overclock: “Face Melter” (Unstable) for increased direct damage, or “Sticky Fuel” (Clean) for area denial and sustained DoT.
Subata 120 (Driller): Reliable Secondary Utility
The Subata 120, while not a primary damage dealer, is an incredibly reliable secondary weapon for the Driller. Its versatility with mods allows it to fill various utility roles, from weak point targeting to applying status effects. With “Volatile Bullets,” it can ignite enemies, synergizing with the Driller’s other tools or the Plasma Carbine. It’s often underestimated but provides crucial backup and utility.
Optimal Overclock: “Volatile Bullets” (Clean) for fire application, or “Mactera Toxin” (Clean) for specialized anti-Mactera builds.
Here is a more comprehensive Deep Rock Galactic: Rogue Core weapon tier list, including brief rationale for each entry:
| 層級 | Weapon Name | Class Focus | Key Strengths | Weaknesses | Optimal Overclock |
|---|---|---|---|---|---|
| S+ | Plasma Carbine | Scout/Engineer Hybrid | Versatile DPS, AoE & Single Target, High Ammo Efficiency, Synergistic | Requires setup for max damage, projectile speed can be an issue without mods | Volatile Rounds / Charged Shot Focus |
| S | Cryo-Launcher | Driller/Gunner Hybrid | Unmatched Crowd Control, Damage Amplification (shatter), Boss Lock-down | Low direct damage, relies on team follow-up, limited range | Permafrost Engine / Arctic Blast |
| A+ | Heavy Repeater | Gunner/Scout Hybrid | Pinpoint Accuracy, High Weakpoint Damage, Excellent Range, Ammo Efficient | Poor swarm clear, struggles in close quarters | Precision Focus / Rapid Fire Modulator |
| A | Autocannon | Gunner | Sustained AoE, Armor Shredding, Good for Chokepoints, High Ammo | Poor single target DPS, slow spin-up, low accuracy at range | Neurotoxin Payload / Carpet Bomber |
| B+ | Flamethrower | Driller | Consistent DoT, Fear Effect, Area Denial, Good against soft targets | Limited range, ineffective against armored/fire-resistant enemies | Face Melter / Sticky Fuel |
| B | Subata 120 | Driller | Reliable Secondary, Good for Specific Mod Builds (e.g., Explosive Rounds), Utility | Low primary DPS, often requires specific mods to be impactful | Volatile Bullets / Mactera Toxin |
| C | Boltshark X-80 | Scout | High burst damage on weak points, good for specific high-mobility builds | Very high skill ceiling, low ammo, poor swarm clear, unforgiving | Compact Ammo / Electro-Minelets (niche) |
To dive deeper, read our guide on DRG Rogue Core Best Builds & Synergies (2026 Meta Guide)
Synergy & Build Crafting: Maximizing Your Loadout Potential
A weapon is only as good as the build surrounding it and the team it’s paired with. Deep Rock Galactic: Rogue Core thrives on synergy, where the sum is far greater than its individual parts. Understanding how your primary, secondary, utility tools, and grenades interact is the key to unlocking true power.
Primary & Secondary Weapon Synergies: Beyond Raw DPS
The best loadouts don’t just pick two strong weapons; they pick two weapons that actively enhance each other’s performance or cover each other’s weaknesses. This goes beyond simple damage output and delves into status effects, crowd control, and resource management.
The “Freeze & Shatter” Combo: Cryo-Launcher + Plasma Carbine
This is arguably the strongest synergy in the 2026 meta for Deep Rock Galactic: Rogue Core. The Driller’s Cryo-Launcher, especially with the “Permafrost Engine” Overclock and freezing rate mods, can quickly freeze entire swarms or lock down high-priority targets like Praetorians and Oppressors. Once frozen, the Plasma Carbine, armed with “Volatile Rounds,” becomes a devastating damage dealer. A single charged shot from the Plasma Carbine can shatter multiple frozen Grunts, dealing up to 300% of its kinetic damage, multiplied further by the Volatile Rounds’ +40% bonus against status-affected enemies. This allows for unparalleled burst damage and efficient swarm clear, even against heavily armored foes.
Numerical Breakdown: Let’s say a Plasma Carbine charged shot deals 45 base kinetic damage.
This combo can instantly clear entire groups of powerful enemies, making high-Hazard missions significantly more manageable.
Area Denial & Single Target Burst: Autocannon + Revolver
For Gunners, balancing swarm clear with single-target damage is crucial. The Autocannon, especially with “Neurotoxin Payload” or “Carpet Bomber,” excels at sustained AoE damage and armor shredding, covering wide areas and suppressing swarms. However, it’s slow to spin up and lacks precision for distant or fast-moving targets. This is where a high-damage, accurate secondary like the Revolver (with “Elephant Rounds” or “Magic Bullets”) comes in. The Revolver can quickly dispatch Mactera, Acid Spitters, or target weak points on elites that the Autocannon struggles to hit. This combination provides a complete package for the Gunner, allowing them to adapt to any threat.
Strategic Application: Use the Autocannon to manage incoming swarms and apply Neurotoxin. When a Praetorian or Warden appears, quickly switch to the Revolver to burst down its weak point. This dynamic switching maximizes efficiency and minimizes downtime.
Utility Tools & Grenades: The Force Multipliers
Your utility tools and grenades are not afterthoughts; they are integral parts of your combat kit, often providing crucial crowd control, mobility, or tactical advantages that amplify your weapon choices.
Platform Gun’s Role in Combat Positioning and Chokepoints
The Engineer’s Platform Gun is more than just for mining high-up minerals. Strategically placed platforms can create defensible chokepoints, funneling enemies into kill zones for the Autocannon or Flamethrower. They can also create elevated firing positions for the Heavy Repeater or Plasma Carbine, giving a clear line of sight to weak points. In a pinch, platforms can even block incoming projectiles or provide a quick escape from being surrounded.
LURE Grenades: Tactical Repositioning and Target Aggro Manipulation
LURE grenades (Scout/Engineer) are invaluable for drawing enemy aggro away from critical objectives or downed teammates. They can consolidate a dispersed swarm into a tight cluster, making them perfect targets for an AoE weapon like the Autocannon or a well-placed Cryo-Launcher blast. Using a LURE allows you to create breathing room, reload safely, or set up devastating coordinated attacks with your team.
Here are some highly synergistic loadout examples for Deep Rock Galactic: Rogue Core, demonstrating how primary, secondary, utility, and grenades can work together:
| Loadout Name | Primary Weapon (Overclock) | Secondary Weapon (Overclock) | Grenade | Utility Tool | Core Strategy |
|---|---|---|---|---|---|
| Cryo-Shatter Specialist | Cryo-Launcher (Permafrost Engine) | Plasma Carbine (Volatile Rounds) | Impact Axe | Drill/Shield | Freeze entire swarms/elites, then shatter with Plasma Carbine. Use axes for high burst on frozen targets. |
| Artillery & Precision Gunner | Autocannon (Neurotoxin Payload) | Heavy Repeater (Precision Focus) | Incendiary Grenade | Shield Generator | Autocannon for swarm control & DoT, Heavy Repeater for elite/boss weak points. Grenades for extra AoE/fear. |
| Agile Marksman Scout | Heavy Repeater (Rapid Fire Modulator) | Boltshark X-80 (Compact Ammo) | Cryo Grenade | Grappling Hook | High mobility, rapid weak point targeting with Repeater, Boltshark for high-burst follow-up. Cryo for emergency CC. |
| Defensive Engineer | Plasma Carbine (Charged Shot Focus) | Breach Cutter (High Voltage Crossover) | LURE Grenade | Platform Gun/Turrets | Plasma Carbine for general DPS, Breach Cutter for dense swarms/armor. LUREs to funnel enemies into turret/Breach Cutter lines. |
To dive deeper, read our guide on DRG Rogue Core Ultimate Beginner’s Guide: Survive the Deep (2026)
Advanced Tactics & Resource Management for Deep Rock Galactic: Rogue Core
Mastering Deep Rock Galactic: Rogue Core goes beyond weapon choices; it demands strategic thinking, efficient resource management, and a deep understanding of mission flow. High-Hazard runs punish inefficiency, making every decision count.
Optimizing Resource Acquisition: Morkite, Nitra, and Credits
Resources are the lifeblood of your expedition. Morkite is your primary objective, Nitra allows for supply drops, and Credits fund all your upgrades and Overclock infusions. Efficiently gathering these while managing threats is a skill that separates greenbeards from veterans.
Efficient Mining Techniques: Maximizing Vein Yields and Speed
Always prioritize veins that can be quickly and safely extracted. For vertical veins, Engineers should place platforms strategically to allow Scouts to quickly mine. Driller’s drills are invaluable for creating tunnels to otherwise inaccessible areas or clearing large mineral deposits. Learn the optimal angles to mine different mineral types to minimize lost resources. For example, mining from the top down on a Morkite vein often yields more than attempting to mine from the side, as fragments fall directly to your feet instead of scattering.
Resource Yield Comparison Table (Approximate Values per Node):
| Resource Type | Typical Node Yield | Optimal Mining Method | 注意事項 |
|---|---|---|---|
| Morkite | 15-25 units | Top-down mining, Engineer platforms for high veins | Primary mission objective in many biomes. |
| Nitra | 20-35 units | Full extraction, prioritize accessibility | Crucial for Supply Pods. Don’t leave any behind. |
| Gold | 30-50 units | Power attack + pickaxe combo for quick break | For credits. Consider leaving if time is critical. |
| Rare Minerals (e.g., Croppa, Umanite) | 5-15 units | Targeted mining, often in difficult spots | Used for weapon upgrades and Overclocks. |
Nitra Economy: When to Call Supply Pods vs. Conserve Ammo
Nitra is your lifeline. A common mistake is calling supply pods too early or too late. A good rule of thumb for a four-player team is to call a supply pod when at least two players are below 50% ammo on their primary weapon, or when the team’s combined Nitra reaches 80-100 units, allowing for a full pod. Avoid calling a pod for only one person, as this is inefficient. Conversely, don’t wait until everyone is completely out of ammo and overwhelmed by a swarm. Proactive supply drops in safe locations are key to survival.
Ammo Conservation Tips:
High-Level Mission Strategy: Objective Prioritization and Kiting
Beyond individual combat, understanding the flow of a mission and making intelligent tactical decisions as a team is paramount for success in Deep Rock Galactic: Rogue Core.
Dealing with Elite Threats: Weak Point Exploitation and Environmental Hazards
Every elite enemy in Deep Rock Galactic: Rogue Core has distinct weak points and attack patterns. Learning these is non-negotiable for high-Hazard missions. For example, Praetorians and Oppressors have glowing sacs on their backs, which are critical weak points. Dreadnoughts have exposed fleshy areas that appear after breaking their armor. Focusing fire on these weak points can multiply your damage by 2x to 5x, drastically reducing kill times.
Environmental hazards like explosive plants (Gas Blooms, Exploding Plants) or geological features (volcanic vents) can be leveraged for massive damage. Luring a swarm or an elite enemy into an explosive plant and detonating it with a single shot can clear entire waves or deal significant damage to a boss, saving precious ammo.
Core Boss Weakness Chart (Example):
| Enemy Type | Primary Weak Point | Elemental Vulnerability | Damage Resistance (Explosive) | CC Effectiveness (Freeze/Stun) |
|---|---|---|---|---|
| Praetorian | Abdomen (Back) | Fire, Freeze | High (Body), Low (Weak Point) | Medium (Freeze), Low (Stun) |
| Oppressor | Abdomen (Back) | N/A (Resistant) | Very High (Body), Low (Weak Point) | Low (Freeze), Low (Stun) |
| Dreadnought (Cocoon) | Exposed Sacs (when armor broken) | Varies by type (e.g., Fire for Hiveguard) | 中型 | Immune |
| Mactera Spawn | Head | N/A | 低 | High (Freeze/Stun) |
The Art of Kiting: Managing Swarm Pressure and Reload Windows
Kiting is the act of strategically moving to control enemy positioning, buy time, and create favorable engagements. This is especially vital for classes with limited AoE or slow reload times. When a massive swarm descends, instead of standing your ground and getting surrounded, retreat to a more defensible position (e.g., a tunnel, an elevated platform, or a chokepoint created by an Engineer). Use your mobility tools (Grappling Hook, Drills) to maintain distance. This allows you to reload safely, regenerate shields, and funnel enemies into tighter groups, making them easier targets for your AoE weapons or grenades. Effective kiting can turn a seemingly unwinnable situation into a manageable one.
To dive deeper, read our guide on How to Farm Expenite Fast in DRG Rogue Core (Best Routes 2026)
Overcoming the Grind: Expedited Progress & High-Tier Strategies
Deep Rock Galactic: Rogue Core, for all its glory, can sometimes feel like a relentless grind. The pursuit of that perfect Overclock, the endless hunt for rare minerals, and the sheer volume of credits needed to fully upgrade every weapon can be daunting, turning joyous expeditions into monotonous chores. The late-game wall is real, and it can test even the most dedicated prospector’s patience.
The Late-Game Wall: Overclock RNG and Core Infusion Bottlenecks
As you delve deeper into Deep Rock Galactic: Rogue Core, the progression shifts from unlocking new weapons to refining existing ones. This is where the Overclock system becomes central. However, acquiring specific “God-Roll” Overclocks is heavily reliant on RNG. You’ll spend countless hours running missions, completing weekly core hunts, and delving into deep dives, only to receive duplicates or Overclocks for weapons you rarely use. This frustrating pursuit can easily add hundreds of hours to your playtime, not all of it enjoyable.
The Frustrating Pursuit of God-Roll Overclocks
Imagine needing the “Volatile Rounds” Overclock for your Plasma Carbine to complete your S-tier build, but after 50 hours of grinding, you still haven’t seen it. Instead, you’ve accumulated three “Compact Ammo” Overclocks for the Boltshark X-80, a weapon you’ve never touched. This is the reality for many players. Each core infusion is a gamble, and the odds of getting that one specific, meta-defining Overclock can feel astronomically low. The sheer volume of content you need to complete for a single core infusion can be exhausting, repeating the same mission types over and over.
Credit and Resource Sinks: Upgrading All Your Gear
Beyond Overclocks, fully upgrading every weapon and piece of gear to Tier 5 requires an astronomical amount of credits and rare minerals. Each Tier 5 upgrade can cost upwards of 15,000 credits and dozens of rare minerals like Croppa, Magnite, or Umanite. If you’re looking to experiment with multiple builds or simply max out your entire arsenal, you’re looking at hundreds of thousands of credits and thousands of rare minerals. This necessitates endless grinding runs, often in less engaging missions, purely for resource acquisition. The thrill of discovery can quickly give way to the weariness of repetitive tasks.
Tired of spending hundreds of hours grinding for that one elusive overclock or enough credits to fully max out your favorite Deep Rock Galactic: Rogue Core build? The relentless pursuit of perfection can turn into a monotonous chore, draining the joy out of an otherwise fantastic game. This is where XMODhub provides a revolutionary solution, transforming your Deep Rock Galactic: Rogue Core experience into pure, unadulterated fun, allowing you to focus on the core gameplay and strategic depth without the tedious grind.
XMODhub offers unparalleled control over your Deep Rock Galactic: Rogue Core experience, giving you access to powerful features like Infinite Health, Infinite Ammo, No Reload, and even Instant Overclocks. Imagine instantly trying out that S-tier Plasma Carbine build with “Volatile Rounds” without the grind, or experimenting with every possible weapon mod combination to find your perfect playstyle. XMODhub empowers you to bypass the repetitive elements and jump straight into mastering high-Hazard missions with any build you desire.
Getting started with XMODhub is incredibly simple:

It’s a seamless way to enhance your gameplay and explore the full potential of Deep Rock Galactic: Rogue Core without the artificial barriers of endless resource farming. Experience the game on your terms, mastering every weapon and build without the typical time investment.
Beyond the Base Game: Community Mods and Future-Proofing Your Experience
While XMODhub offers direct enhancements, the Deep Rock Galactic: Rogue Core community also thrives on player-created modifications. These range from minor quality-of-life improvements to significant gameplay overhauls. Staying engaged with the modding community can offer fresh perspectives and extend the game’s longevity.
Leveraging Quality-of-Life Mods for Enhanced Gameplay
Community-driven QoL mods can address minor annoyances or add features that enhance your overall experience. This could include improved UI elements, clearer enemy health bars, or even custom crosshairs. While not directly impacting weapon tiers, these can make the game more enjoyable and reduce friction, allowing you to focus better on combat and strategy.
Anticipating Future Patches: Staying Ahead of the Meta Curve
The Deep Rock Galactic: Rogue Core meta is dynamic. New seasons, weapon rebalances, and enemy introductions can shift weapon tiers overnight. Staying informed about developer announcements, patch notes, and community discussions is crucial. Engage with official forums, Reddit communities, and content creators to understand upcoming changes. A weapon that’s B-tier today might become S-tier next month with a simple tweak to its damage multiplier or an Overclock adjustment. Proactive adaptation is the mark of a true veteran.
Early Game Arsenal: Best Weapons for New Prospectors
For new players diving into the treacherous depths of Deep Rock Galactic: Rogue Core, the sheer variety of weapons and their complex modding options can be overwhelming. The early game is about survival, learning the ropes, and finding weapons that are forgiving and effective without requiring intricate synergies or rare Overclocks. Here are some top recommendations for prospectors just starting their journey, prioritizing ease of use, reliable damage, and decent ammo economy.
Choosing the right weapon early on can significantly impact your learning curve and enjoyment. Focus on weapons that offer a balanced approach to swarm clear and single-target damage, or excel in one area without being overly specialized. Ammo efficiency is also critical, as early runs often mean less Nitra for resupplies.
| Weapon Name | Primary Strength for Beginners | Why It’s Good for New Players |
|---|---|---|
| Plasma Carbine | Versatile DPS, good AoE | Easy to aim, good all-rounder for both swarms and single targets, scales well into late game. |
| Autocannon | High AoE, armor shredding | Massive ammo pool, forgiving against swarms, great for holding positions, less reliance on precise aim. |
| Flamethrower | Consistent DoT, crowd control | Excellent for clearing close-range swarms, fear effect provides breathing room, intuitive to use. |
| Heavy Repeater | Precise single-target damage | Good for learning weak point targeting, reliable at range, conserves ammo if shots are accurate. |
While the Cryo-Launcher is S-tier, its reliance on team synergy for maximum damage can make it less ideal for solo beginners or uncoordinated teams. Similarly, weapons with very low ammo counts or high skill ceilings (like the Boltshark X-80) are best reserved for when you have a deeper understanding of the game’s mechanics.
Beyond Overclocks: Mastering Weapon Mods & Customization
While Overclocks undeniably provide the most dramatic changes to a weapon’s functionality, the true depth of Deep Rock Galactic: Rogue Core’s arsenal lies in its extensive modding system. Understanding how to strategically choose and combine weapon modifications (mods) across all five tiers can elevate even a B-tier weapon to surprising effectiveness and tailor it precisely to your playstyle or mission needs. It’s not just about picking the biggest damage numbers; it’s about crafting a cohesive combat tool.
Key Modding Principles for Optimal Weapon Performance
Effective modding goes beyond simply selecting the “best” option in each tier. It involves a holistic approach to your weapon, considering its inherent strengths and weaknesses, your chosen Overclock, and how it fits into your overall loadout and team composition. Here are crucial principles to guide your mod choices:
By applying these principles, you can transform a basic weapon into a highly specialized and devastating tool, perfectly suited for the challenges of Hoxxes IV.
常見問題
A: While Deep Rock Galactic: Rogue Core strives for balance, the 2026 meta does exhibit clear tiers of weapon effectiveness. Weapons like the Plasma Carbine and Cryo-Launcher are objectively superior in terms of their versatility, damage output, and synergy potential across a wide range of mission types and hazards. However, “objectively superior” doesn’t mean other weapons are useless. Many B-tier weapons can still be highly effective in specific niches or with expert players who fully understand their mechanics and pair them with synergistic builds. The game’s dynamic nature means that while some weapons are consistently strong, player skill and team composition can elevate almost any weapon.
A: The Deep Rock Galactic: Rogue Core meta typically shifts with major seasonal updates (roughly every 3-4 months) or significant mid-season patches. These shifts are primarily caused by: New Content: Introduction of new weapons, Overclocks, enemy types, or mission modifiers. Weapon Rebalances: Developer adjustments to weapon base stats, mod values, or Overclock effects. Community Discoveries: Players uncovering previously overlooked synergies or optimal build paths that weren’t immediately obvious. The 2026 meta, for instance, was heavily influenced by the introduction of Void Swarmers and Corrupted Praetorians, which shifted focus towards AoE and armor-shredding capabilities.
A: Absolutely! While not S-tier, the Boltshark X-80 for the Scout is often underrated. Many players dismiss it due to its high skill ceiling and low ammo capacity. However, with the “Compact Ammo” Overclock and precise weak point targeting, it can output incredibly high burst damage, especially against high-health elites. It requires exceptional aim and movement, but in the hands of a master Scout, it can rival the damage of a primary weapon for specific targets. Similarly, the Driller’s Colette Wave Cooker, when paired with specific elemental primaries, can become a devastating secondary DoT machine, often overlooked for its raw damage numbers.
A: The most effective way to farm resources involves a multi-pronged approach: Deep Dives & Elite Deep Dives: These are your primary source of Blank Matrix Cores and Infusion Cores, which are crucial for Overclocks. They also offer significant credit and mineral bonuses. Weekly Core Hunts: Always prioritize these as they guarantee an Overclock. High-Hazard, Short Missions: For general credits and common minerals, run quick “Point Extraction” or “Egg Hunt” missions on Hazard 3-4. These offer a good balance of challenge and reward per minute. Machine Events: Always complete Machine Events in missions. They provide additional rewards and an opportunity to infuse Blank Cores. Remember to always fully explore caves for secondary objectives and rare minerals. Efficiency is key; don’t waste time in low-yield missions if your goal is specific high-tier resources.
Final Verdict: Mastering Deep Rock Galactic: Rogue Core
The journey to mastering Deep Rock Galactic: Rogue Core is a continuous evolution, demanding not just skill but also adaptability and a profound understanding of its intricate systems. The 2026 meta, with its dynamic threats and complex weapon synergies, rewards those who delve deep into the mechanics, experiment with builds, and coordinate seamlessly with their team. While our tier list provides a definitive roadmap to the most powerful weapons, remember that true mastery comes from recognizing when to deviate, when to innovate, and when to leverage the unique strengths of every tool at your disposal. Rock and Stone, always!
Whether you choose to meticulously grind for every Overclock and resource, or you prefer to accelerate your journey to ultimate power, the path to dominating Hoxxes IV is yours to forge. For those who wish to bypass the repetitive resource acquisition and immediately experiment with every S-tier build imaginable, XMODhub offers an unparalleled solution. Dive into the heart of Deep Rock Galactic: Rogue Core with limitless potential, explore every weapon combination, and experience the game’s strategic depth without artificial constraints. XMODhub’s robust platform supports over 5000+ single-player titles like SpaceCraft 或 Warhammer 40,000: Space Marine 2, empowering you to redefine your gaming experience across a vast library. Embrace the power, and conquer the cosmos.