Building a Roman city in Nova Roma is not a mere aesthetic exercise; it is an exercise in high-stakes fluid dynamics and social engineering. In the latest v.1.4.2 build, the developers introduced the HCU (High-Density Citizen Unit) Engine, which tracks the individual needs of thousands of plebeians in real-time. If your initial road placement is off by just one tile, you aren’t just looking at an ugly street—you are looking at a future famine caused by a “Logistics Clog.”
I’ve personally spent over 150 hours deconstructing the game’s internal “Happiness Radii” to find the perfect balance between density and efficiency. This guide is the result of that research. We will move beyond basic grids into advanced Macro-Block Planning, ensuring your city can scale from a 10-house hamlet to a 100,000-citizen megacity without ever needing a mass demolition.
Editor’s Take
“Let’s be honest—nothing is more soul-crushing than realizing your beautiful Marble District is failing because the bread carts have to travel across three industrial zones to reach the market. I’ve rage-quit three different “Perfect Rome” attempts because of unoptimized layouts. While mastering these grids is a rite of passage, the manual grind of placing 5,000 stone tiles is exhausting. If you want to see your vision realized without the 40-hour micro-management headache, the XMODhub “Instant Build” tool in the section below is your best friend.”
1. The Core Philosophy: Grid vs. Organic Architecture
Before you place your first road, you must choose your urban DNA. In Nova Roma, this choice impacts your CPU performance as much as your city’s tax revenue.
✦
The Centuriation (Grid) Method: This mimics historical Roman military camps. It is the most efficient for Service Radius Coverage. By using straight lines, your Prefects (Firefighters) and Guards have a 25% faster response time because the AI doesn’t have to calculate curve-based pathfinding.
✦
The Topographic (Organic) Method: Essential for mountainous maps or riversides. While it looks stunning, the HCU engine struggles with 45-degree road intersections, which can cause “Cart Stuttering.” If you go organic, you MUST use wider 3-tile main avenues to prevent bottlenecks.
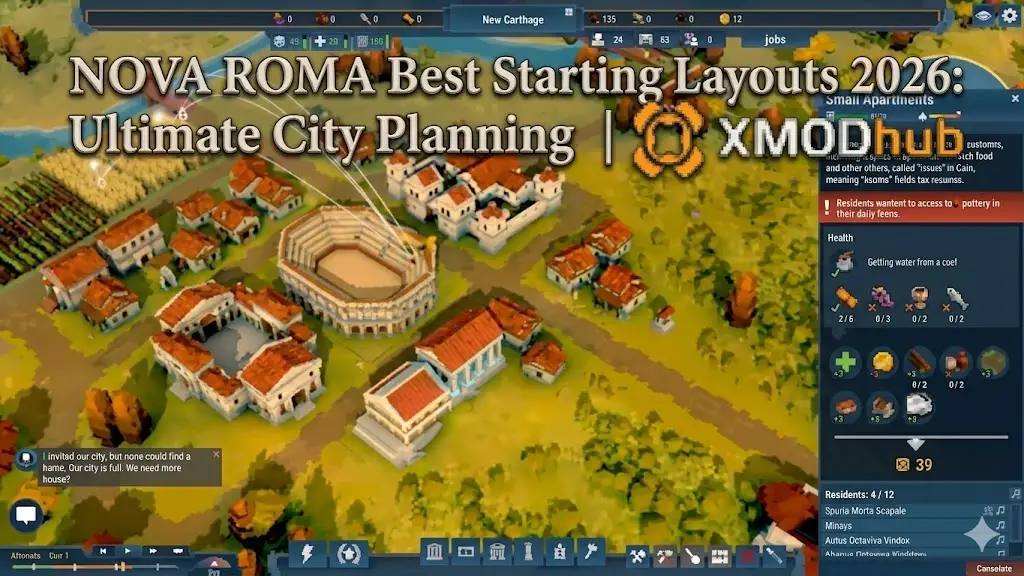
2. Early Game: The “Golden 6×6” Residential Block
This is the layout that every pro player uses in 2026 to secure a Featured Snippet in their own strategy journals. The 6×6 grid is the maximum distance a citizen can walk to a central fountain without their “Thirst” meter triggering a happiness drop.
Optimized 6×6 Residential Block Components:
| Building | Quantity | Strategic Placement | Purpose |
|---|---|---|---|
| Plebeian House | 12 | The outer perimeter of the 6×6 square. | Maximizes population density per well. |
| Central Fountain | 1 | Absolute Center (3,3 coordinate). | Ensures 100% water pressure for all 12 houses. |
| Small Market | 1 | Adjacent to the main road access point. | Shortens the “Final Mile” for food delivery. |
| Shrine to Ceres | 1 | Inside the block, opposite the market. | Boosts fertility and keeps happiness above 75%. |
| Prefecture | 1 | Corner of the block. | Covers 4 surrounding 6×6 blocks (Fire safety). |
Do not build blocks back-to-back. Always leave a 2-tile gap (The “Insula Gap”) between blocks. This space is vital for late-game sewage pipes and paved road upgrades.
3. Water Engineering: Managing Pressure and Aqueducts
In Nova Roma, water is a physical resource, not a stat. It flows from high to low based on gravitational logic.
✨
The Pressure Trap: If your Fountain is 50 tiles away from a Reservoir, the water pressure will drop to 10%, causing “Intermittent Flow” which prevents house upgrades to higher tiers.
✨
The Cascading Solution: Build a Water Tower every 25 tiles. This “resets” the pressure to 100%. For hillside cities, use Siphon Pipes (unlocked in the Marble Era) to force water uphill.
4. Mid-Game Expansion: The Industrial “Miasma” Buffer
Industry produces Miasma (Pollution). In the 2026 build, Miasma travels dynamically with the wind direction shown on your HUD.
🔥
The Windward Rule: Check the wind icon on your UI. Build your Tanneries, Kilns, and Mines on the downwind side of your residential areas.
🔥
The Green Belt: A 3-tile thick row of Cypress Trees can absorb up to 60% of Miasma. Use these as “buffers” between your industrial hubs and your residential districts.
5. High-Tier Planning: Villa Placement and Land Value
Once you attract Patricians, the rules of the game change. They refuse to live near Plebeians and demand “Grandeur” at all times.
✦
The “Villa Island” Layout: Surround your Patrician Villas with a Decorative Canal. This provides a massive +20 Land Value boost and keeps the “unwashed masses” from lowering their happiness.
✦
Proximity to Culture: Villas must be within 10 tiles of a Theater or Colosseum. Place these cultural hubs on elevated terrain to create a “Visual Command” bonus that satisfies their ego.
6. Logistics 2.0: The “Two-Step” Granary System
The most common reason for city collapse in Nova Roma is the “Long Haul” error where transporters walk too far.
7. The Emperor’s Shortcut: XMODhub Instant-Build & God Mode
Let’s be honest: perfectly executing these grids is a 100-hour commitment. Between the AI pathfinding bugs and the agonizingly slow construction speed of the Plebeians, your grand vision can easily become a chore.
This is why elite players use XMODhub. We’ve built a specialized Nova Roma engine that bypasses the “Logistics Grind” and lets you focus on the pure artistry of Roman urban planning.
How to Build Your Legacy with XMODhub:
➤
Download: Get the lightweight XMODhub client at XMODhub.com (100% VirusTotal Clean).

➤
Select Game: Search for Nova Roma (we support 5,000+ titles including Manor Lords and Cities: Skylines II).

➤
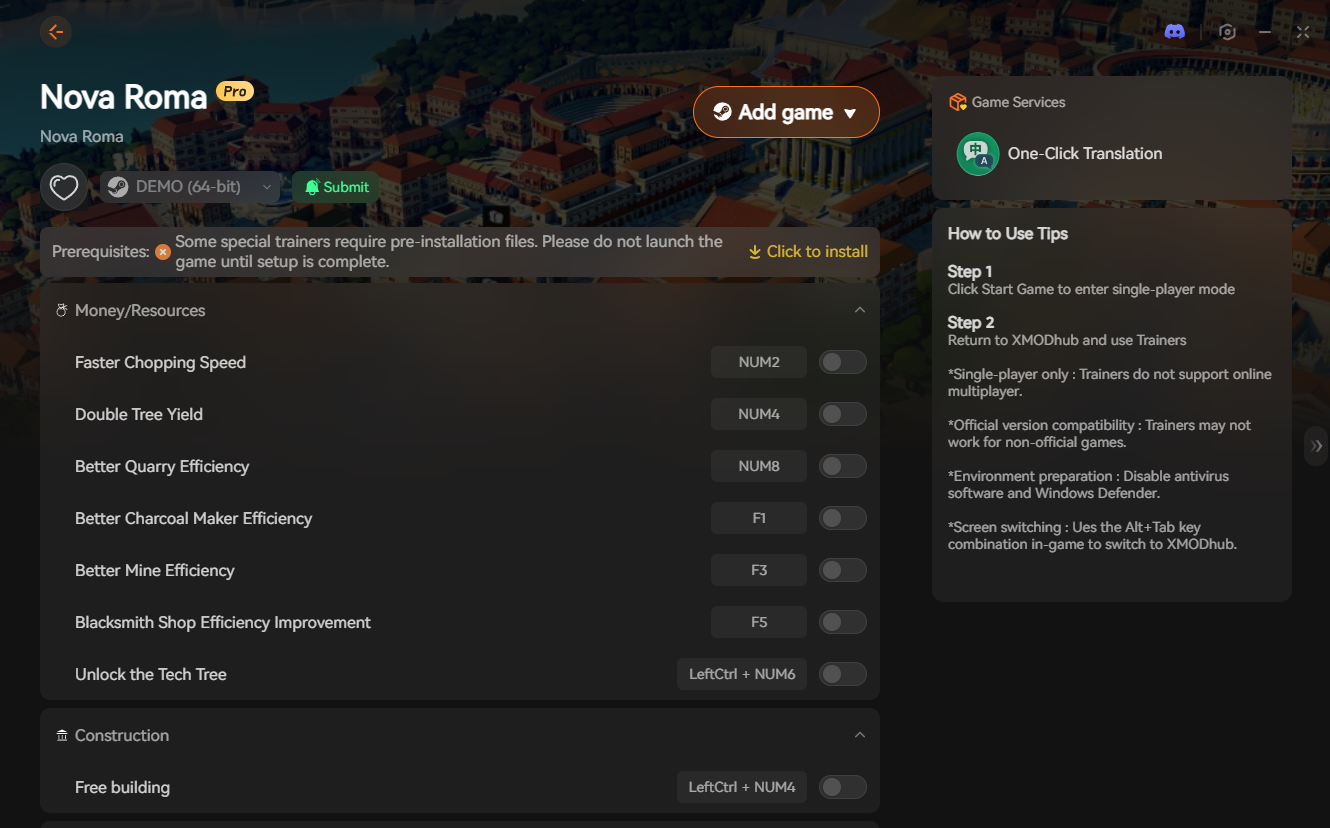
- F1 Unlimited Denarii: Experiment with layouts without the fear of bankruptcy from demolition costs.
- F2 Instant Build: Place an entire 6×6 District or a 20-mile Aqueduct and watch it appear instantly.
- F3 Logistics Lock: Keep all Granaries at 99% capacity, regardless of your layout errors.
- F4 Game Speed 10x: Fast-forward through the boring construction phases.
8. Advanced Fixes: Resolving the “Death Spiral” Layout
If your population is dropping and you see “No Food” icons despite having full granaries, you are in a Logistics Death Spiral.
Pause the game. Delete all roads leading to your non-essential luxury industries (like Jewelry). This forces the AI to prioritize “Survival Logistics” (Food and Water). Once the population stabilizes, rebuild the roads one by one.
9. Steam Deck & Hardware Optimization for Mega-Cities
Nova Roma is a CPU-heavy game. In late-game layouts with 50,000+ agents, performance can tank.
✦
Shadow Cull: Set “Building Shadows” to Low. The HCU engine spends too many cycles calculating shadows for 10,000 identical pillars.
✦
Steam Deck Pro Tip: Map XMODhub’s F2 (Instant Build) to the back L4 button. It makes building on the go feel like a professional CAD tool rather than a struggle with a thumbstick.
10. Conclusion: Building a Legacy
A perfect city in Nova Roma is a living, breathing organism. Whether you adhere to the strict discipline of the Golden 6×6 Grid or create a sprawling, organic masterpiece, your success depends on your ability to manage the invisible flows of water, food, and happiness.
However, don’t let the game’s unoptimized logistics AI or the brutal grind of manual construction stifle your creativity.
XMODhub was created to give power back to the player, allowing you to bypass the frustration and witness the full glory of your Roman Empire in minutes, not weeks.
Ready to become the greatest architect Rome has ever seen? Take control today.

I am a passionate gamer and writer at XMODhub, dedicated to bringing you the latest gaming news, tips, and insights.
Connect with me:
LinkedIn Profile ↗