Summary: This guide covers all Chapter 1 bosses in Black Myth: Wukong, including their locations, key strategies, and how to beat them.
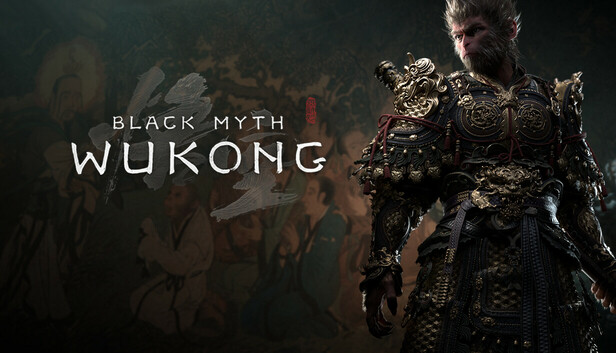
Black Myth: Wukong starts strong with a lineup of tough Chapter 1 bosses that test your combat skills and understanding of the game’s mechanics.
From mythical creatures to deadly warriors, each boss offers a unique challenge.
This guide covers all the Black Myth: Wukong chapter 1 bosses, where to find them, how to defeat them, and how Xmod can improve your overall gameplay experience.
Table of contents
- What are Black Myth: Wukong chapter 1 bosses?
- All Black Myth: Wukong chapter 1 bosses
- How can you enhance Black Myth: Wukong gaming with Xmod?
- Conclusion
What are Black Myth: Wukong Chapter 1 Bosses
Searching for every boss in Chapter 1 of Black Myth: Wukong? The opening chapter, titled “Black Cloud, Red Fire,” introduces players to two main boss types: Yaoguai Chiefs and Yaoguai Kings. As expected, Kings pose a greater challenge and play a more significant role in the story, much like Remembrance bosses in Elden Ring.
Staying true to its soulslike roots, Black Myth: Wukong hides many of its bosses behind complex level design and hidden paths—making some encounters easy to miss without help. If you’re aiming to complete your Journal and defeat all 11 Chapter 1 bosses, this guide will walk you through each one’s location and how to find them.
All Black Myth: Wukong Chapter 1 Bosses
Chapter 1 of Black Myth: Wukong features a total of 11 bosses, including 4 optional ones. Here’s a complete list of all the Chapter 1 bosses, detailing the mandatory ones you must defeat along with their locations, as well as the optional bosses you can choose to challenge.
To help you easily find out which bosses you’ve missed, here are all the Yaoguai King and Yaoguai Chief bosses you can find in Chapter 1:
|
No. |
Boss Name |
Type |
Location |
| 1 |
Bullguard |
Yaoguai Chief | Forest Of Wolves / Front Hills |
| 2 |
Wandering Wight |
Not In Journal | Forest Of Wolves / Outside The Forest |
| 3 |
Guangzhi |
Yaoguai Chief | Forest Of Wolves / Outside The Forest |
| 4 |
Lingxuzi |
Yaoguai King | Forest Of Wolves / Guanyin Temple |
| 5 |
Baw-Li-Guhh-Lang |
Yaoguai Chief | Bamboo Grove / Snake Trail |
| 6 |
Guangmou |
Yaoguai Chief | Bamboo Grove / Snake Trail |
| 7 |
Whiteclad Noble |
Character | Bamboo Grove / Marsh Of White Mist |
| 8 |
Black Wind King |
Yaoguai King | Black Wind Cave / Cave Interior |
| 9 |
Black Bear Guai |
Yaoguai King | Black Wind Cave / Bodhi Peak |
| 10 |
Elder Jinchi (secret boss) |
Yaoguai King | Secret: Ancient Guanyin Temple / Grand Chamber |
| 11 |
The Red Loong (secret boss) |
Yaoguai King | Forest Of Wolves / Loong Claw Grove |
Bullguard

The Bullguard is the first boss players encounter in Black Myth: Wukong after finishing the prologue. This battle serves as an introduction to the game’s mechanics, allowing players to get comfortable with the dodging skills that are crucial for surviving tougher bosses later on. Although the Bullguard is a slow-moving giant, it wields a polearm that can strike quickly, making this fight a perfect chance to master timing your dodges.
During this encounter, players also learn their first spell, the Immobilize spell. While the Bullguard isn’t hard to find or defeat, this early challenge prepares players for the more demanding bosses ahead, including some of the secret bosses later in the chapter. From here, the real journey begins.
Location: Forest Of Wolves / Front Hills
Bullguard’s attacks are powerful but slow, with significant gaps between each strike. Concentrate on dodging its blows and quickly counterattack when you see an opening. The Immobilize spell you unlock during this battle can give you a valuable edge.
Wandering Wight

Wandering Wight is a sort of secret mini-boss not recorded in the journal alongside the Yaoguai bosses and is technically linked to a later boss, Elder Jinchi. This foe can be quite challenging for players fresh from the Bullguard fight, but with persistence, it can be defeated efficiently. Having this boss roam the starting area sets a grim tone for what’s to come.
As a hidden optional boss, Wandering Wight is tough to face early on due to limited skills and abilities. For players seeking a less difficult start, it’s possible to avoid the fight by carefully running past the areas where Wandering Wight patrols. Its long-range magic and powerful physical attacks can quickly overwhelm unprepared players, so sometimes retreating and returning later with better gear and experience is the smartest choice.
Location: Forest Of Wolves / Outside The Forest
Defeating Guangzhi, a nearby easier boss, unlocks a transformation that proves valuable against the Wandering Wight due to its strong moveset, high damage, and durability. Upgrading the Immobilize spell is crucial, as it provides opportunities to counterattack and stagger the boss.
Guangzhi

Guangzhi is a Yaoguai Chief located on the opposite side of the “Outside The Forest” area from the Wandering Wight. To reach him, begin at the region’s Shrine and take the left path ahead. Pass by a chest (open it if you haven’t yet), then cross the bridge guarded by the Wolf Archer. Follow the path as it curves left, leading you into a clearing where Guangzhi awaits.
Armed with a flaming double-edged sword, Guangzhi delivers rapid combo attacks and ranged throws, making him a challenging opponent to pin down. Use your Immobilize spell frequently to freeze him and create openings for damage. Fortunately, his health isn’t very high, so maintaining an aggressive approach works best. Defeating Guangzhi unlocks the powerful Red Tides Spell, allowing you to transform into Guangzhi temporarily. Don’t forget to ring the Bell found in this arena as well.
Location: Forest Of Wolves / Outside The Forest
Guangzhi is a quick and agile boss who can swiftly counter slow, charged attacks. Rather than holding down heavy attacks, prioritize dodging and landing Light Attacks to accumulate Focus Points. When you have enough Focus Points, you can release a fully charged Heavy Attack instantly to deal powerful damage.
Lingxuzi

Lingxuzi is the first Yaoguai King you’ll face in the game. This massive wolf-like creature awaits inside Guanyin Temple, located at the end of the Forest of Wolves, past the Wandering Wight. The route to reach him is straightforward and linear, so finding this boss won’t be a problem.
As you get closer, your ally, the Keeper, will warn you that defeating Lingxuzi is impossible. But don’t be discouraged—he greatly underestimates your abilities. Lingxuzi mainly uses two attacks: a quick two-part swipe combo and a charging bite. Once you learn to recognize and dodge these, the fight becomes much easier, especially if you use the Immobilize spell and the Red Tides transformation (if you’ve unlocked it).
Location: Forest Of Wolves / Guanyin Temple
When Lingxuzi climbs onto the rooftops, stay still and wait for his aerial attack. Dodge at the precise moment.
Baw-Li-Guhh-Lang

Baw-Li-Guhh-Lang is a large amphibious creature found in a scenic section of the river within the Bamboo Grove. Starting at the “Snake Trail” Shrine, go up the stairs, cross the bridge, then follow the path until you reach a wooden sloped platform. Leap off to the right into the river below, then turn and head into the wider part of the river where Baw-Li-Guhh-Lang awaits.
While not the toughest Yaoguai Chief so far, Baw-Li-Guhh-Lang can be annoying. Be especially cautious of his backward kick, which is difficult to predict, and his tongue attack that swings multiple times, requiring you to dodge repeatedly. Other than that, just chip away at his relatively low health until he’s defeated. Afterward, you can absorb his Spirit, allowing you to temporarily transform into him in future battles!
Location: Bamboo Grove / Snake Trail
Baw-Li-Guhh-Lang is easier to handle by staying in front of it and attacking from that position. Its attacks are more predictable and easier to dodge when you face it head-on rather than from behind.
Guangmou

Guangmou is another Yaoguai Chief located in the “Snake Trail” area of the Bamboo Grove. Unlike Baw-Li-Guhh-Lang, Guangmou appears along the main story path, so you’re almost certain to encounter him. Just follow the main route to the large zone filled with Skeletal Snakes, and you’ll find Guangmou’s arena right next to it.
As a magic user, Guangmou relies on ranged attacks, area-of-effect shockwaves, and poison sprays to chip away at your health. It’s best to combine careful dodging with spinning your Staff to block ranged attacks when needed—just watch your stamina. Try to close the gap quickly, and Guangmou will be much less dangerous. After defeating him, don’t forget to absorb his Spirit with the Blessed Gourd, unlocking a useful ranged attack for future fights.
Location: Bamboo Grove / Snake Trail
When Guangmou calls forth spectral snakes, trying to land combo attacks during this phase will likely cause you to get hit by their projectiles, leaving you staggered and poisoned. It’s best to save your Transform spell for this moment to absorb the damage and keep up your assault on Guangmou without interruption.
Whiteclad Noble

Continue following the main path until you reach the bottom of the “Marsh of White Mist” region, where you’ll find a watery arena housing the Whiteclad Noble boss. This enemy isn’t classified as a Chief or King in the Journal, but don’t let that fool you. He has a frustratingly long reach, moves unpredictably, and features two health bars with a second phase where he transforms into a merman-like form.
The Pillar Stance works well against the Whiteclad Noble—use it whenever it’s safe, dodging his attacks while charging your own. Just watch your stamina to avoid running out. After defeating him, you’ll trigger dialogue about three hidden Bells in the land, and one of these Bells can be found near this arena.
Location: Bamboo Grove / Marsh Of White Mist
The Whiteclad Noble is challenging but follows a predictable attack pattern. To win, focus on dodging his strikes and counterattacking when he leaves openings. Reserve your powerful spells for the second phase, as that’s when the fight becomes more difficult.
Black Wind King

The Black Wind King is a challenging opponent who may take several tries to overcome. You’ll face him inside Black Wind Cave, which lies a fair distance past the “Marsh of White Mist” in the Bamboo Grove, though the path is mostly straightforward. He awaits just beyond the double doors near the “Cave Interior” Shrine.
This boss is by far the toughest you’ve faced so far. He can easily break free from your Immobilize Spell, has long and frustrating attack combos, and can transform into an invulnerable gust of wind, charging at you repeatedly—requiring precise timing to dodge. It’s a good idea to return and defeat Guangzhi and the Wandering Wight first if you haven’t already, as their abilities (the Red Tides Spell and Wandering Wight Spirit) are invaluable for quickly bursting down the Black Wind King before he drains too much of your health.
Location: Black Wind Cave / Cave Interior
The Black Wind King becomes easier to defeat once you acquire the Fireproof Mantle after beating the secret boss, Elder Jinchi. Maintain your distance, focus on dodging his attacks, and save your Transformation and Spirit abilities for the fight’s second phase.
Black Bear Guai

The final story boss of Chapter 1 is Black Bear Guai, the more powerful second form of the Black Wind King you faced earlier. You’ll find Black Bear Guai outside the far end of Black Wind Cave, atop Bodhi Peak on the mountain. The path up is linear but involves a lot of stairs, so locating this Yaoguai King is straightforward.
This battle is challenging, so it’s highly recommended to first unlock the secret area in Chapter 1 (detailed below) and defeat Elder Jinchi. Doing so rewards you with an item that’s extremely effective against the flame-heavy Black Bear. The fight’s most dangerous phase occurs when Black Bear Guai transforms into a flaming gust of wind and charges repeatedly, dealing massive damage. Watch closely for the burst of air before each charge—this signals when to dodge. With practice and patience, you’ll defeat Black Bear Guai and successfully complete Chapter 1.
Location: Black Wind Cave / Bodhi Peak
Black Bear Guai is the final boss of Chapter 1. Equip the Agate Jar curio to increase your defense, and in the second phase, activate the Fireproof Mantle to gain temporary immunity to burn damage.
Elder Jinchi (secret boss)

The Elder Jinchi Yaoguai King dwells in a secret Chapter 1 area that unlocks after ringing three Bells scattered across the region. The Bells are located at:
- Guangzhi’s arena (Forest of Wolves / Outside The Forest)
- Up the stairs from Guangmou’s arena (Bamboo Grove / Snake Trail)
- The left path from Whiteclad Noble’s arena (Bamboo Grove / Marsh of White Mist)
You can ring these Bells in any order. After ringing the third Bell, you’ll be transported to the hidden Ancient Guanyin Temple—a memory of the original Guanyin Temple—where you’ll face the secret Elder Jinchi boss.
Elder Jinchi resembles the Wandering Wight from earlier but fights in an arena filled with shambling corpse enemies. You can mostly ignore these corpses, but at times the boss will rise and summon them. It’s crucial to kill the corpses before they reach Elder Jinchi, as each one that reaches him restores his health, extending the battle.
Defeating Elder Jinchi returns you to the Bell near Whiteclad Noble’s arena and rewards you with the Fireproof Mantle Vessel—a valuable item that offers strong protection against fire-based enemies, especially useful for the final Chapter 1 boss, Black Bear Guai.
Location: Secret: Ancient Guanyin Temple / Grand Chamber
Elder Jinchi is a secret boss in this chapter with several powerful attacks you’ll want to avoid whenever possible. Attacking his undead minions will restore some of your health.
When his health drops to half, he will attempt to absorb these minions to heal himself, so during this phase, prioritize eliminating the corpses before they reach him.
The Red Loong (secret boss)

The Red Loong is the most secretive boss in Chapter 1, but you can’t face it until you’ve obtained a special item from Chapter 2, meaning this involves minor spoilers!
To challenge Red Loong, you first need the Loong Scale, a hidden item in Chapter 2. After progressing past the initial fights with the Rat King and Second Rat Prince, head to the First Rat Prince’s cave. On the left side of this arena, you’ll find a fragile clay wall. Break it by:
- Provoking the First Rat Prince to attack it,
- Using the Wandering Wight Spirit’s attack, or
- Using the slam attack from the Azure Dust form (unlocked by completing the Man-In-Stone questline).
Breaking the wall reveals a secret room with a chest containing the Loong Scale. This item unlocks various secret areas, including the one in Chapter 1 where the Red Loong awaits.
The Red Loong resides in a hidden area near the Forest of Wolves. To reach it, start at the “Outside The Forest” Shrine, take the left path, then turn left again after the chest. Cross the river past two Wolf Scouts, then immediately turn left and climb a hidden slope to a new river section with a giant waterfall. If you have the Loong Scale in your inventory, approaching the waterfall will prompt you to interact, causing it to vanish and revealing a passage behind the rocks. This leads you into the boss arena where you’ll face the Red Loong.
Location: Forest Of Wolves / Loong Claw Grove
How to beat:
The Red Loong is a secret boss for a reason; it’s extremely difficult, especially if you face it early in the game.
It’s recommended to wait until you’re at least halfway through Chapter 2 or even in Chapter 3 before attempting this fight, as you’ll be much stronger by then.
However, if you persist, these tips might help:
- Use the Rock Solid ability whenever necessary to mitigate damage.
- Always Target Its Back
- Use All Spells and Spirits You Have
How can you enhance Black Myth: Wukong gaming with Xmod?
As a mod manager and trainer provider, Xmod has numerous cheats and trainers. Anything you want, you can find in Xmod:
- 3D Nav—Quick view of game map
- Perfect Completion in New Game—One-click unlock save
- DLSS Quality Boost—One-click boost FPS&graphics
- Clean up leftover Mod files—One-click cleanup of leftover Mod files to prevent launch issues after game updates
Other than these, Xmod also has many cheats such as Unlimited Item Uses, Refill Gourd, and so on.
To get start:
- Download and install Xmod from the official website on your PC.

- Launch Xmod and allow it to detect Black Myth: Wukong in your game library.
- Choose preferred mods and download it.

- Apply changes and start the game through Xmod for a smoother, more tailored experience.
Conclusion
Chapter 1 of Black Myth: Wukong sets the stage with a lineup of intense and visually stunning boss battles, each offering unique challenges rooted in Chinese mythology. From brutal warriors to mystical beasts, these encounters test your combat skills, timing, and strategy. To make the most of your experience—especially during these demanding fights—using Xmod can greatly enhance your experience and give you more control over your in-game settings. With customized setting and, Xmod helps you fully immerse yourself in the epic journey of the Monkey King.

I am a passionate gamer and writer at XMODhub, dedicated to bringing you the latest gaming news, tips, and insights.
Connect with me:
LinkedIn Profile ↗