Quick Answer
To install a solasta 2 mod for more character faces, download the Unity Mod Manager and target the game’s main directory. Extract your downloaded face mod from Nexus Mods and place it in the newly created Mods folder. Because Solasta II is an Early Access RPG from Tactical Adventures, always back up your save files before modifying character customization data.
ประเด็นสำคัญ
- Version Matching – Early Access patches will frequently break cosmetic mods.
- Required Tools – Unity Mod Manager is required for most Unity-based CRPG mods.
- File Safety – Always back up save files before altering character data.
- Folder Structure – Custom portraits and 3D face meshes use separate directories.
- Next Steps – Let’s break down the details below.
How to Install Custom Face Packs in Solasta II
Installing a solasta 2 mod for more character faces requires setting up Unity Mod Manager (UMM) and placing extracted mod files into the correct game directory. Since the game launched in Early Access on March 12, 2026, manual installation is currently the most reliable method for adding custom tabletop aesthetics. According to PCGamingWiki, modifying Unity-based games requires injecting a custom loader before the game executable runs.
I prefer using the manual UMM method because it gives you absolute control over your load order, which is critical during Early Access. Automated mod managers can sometimes misplace asset bundles when developers push rapid hotfixes, leading to corrupted character models. By handling the files yourself, you always know exactly what is being injected into your D&D CRPG experience.
Downloading Unity Mod Manager for Solasta II
First, download the latest version of Unity Mod Manager from Nexus Mods. Extract the archive to an accessible location like your desktop. Run the installer, select ‘Solasta II’ from the dropdown game list, and point the tool to your main game directory. Click ‘Install’ to patch the game files, enabling it to read custom asset bundles.
Occasionally, your antivirus software might flag UMM as a false positive because it actively modifies an executable file. If the installation fails, temporarily disable your real-time protection, complete the UMM setup, and then add the Solasta II directory to your antivirus exclusion list before turning it back on.
Backing Up Solasta II Early Access Save Files
Before altering any character data, it is crucial to back up your progress. Navigate to %USERPROFILE%\AppData\LocalLow\Tactical Adventures\Solasta2\Saves and copy the contents to a safe folder. I learned the hard way that loading a modded save file without the corresponding custom face pack installed can corrupt the campaign data permanently.
Installing the Character Customization Mod
Once UMM is configured, download your chosen character customization mod. Open the Unity Mod Manager interface, navigate to the ‘Mods’ tab, and drag the downloaded `.zip` file into the installation window. The manager will automatically extract the files and arrange them in the correct load order. Verify that the status indicator turns green before launching the game.
Save File Warning
Never uninstall a face mod while a campaign is active. Doing so will cause characters using those custom faces to fail to load, potentially bricking your save file.
Where is the Solasta 2 Mod Folder Located?
The Solasta 2 mod folder is generated automatically inside your main game installation path after running Unity Mod Manager for the first time. You must launch the game at least once before this directory appears. Knowing exactly where to place your aesthetic enhancement tool is the most common hurdle for new players.
| Mod Type | Directory Path | Required Tool |
|---|---|---|
| 3D Face Meshes | \Solasta2\Mods\ |
Unity Mod Manager |
| Custom Portraits | \Solasta2\Portraits\ |
None (Native) |
| Save Files | \AppData\LocalLow\Tactical Adventures\ |
การสำรองข้อมูลด้วยตนเอง |
Finding the Solasta II Directory on Steam
To locate the installation path quickly, open your Steam library, right-click Solasta II, select ‘Manage,’ and click ‘Browse local files.’ This will open the root directory where the Solasta2.exe file is located. Your newly created ‘Mods’ folder will be visible here.
If you are playing on a different storefront like GOG or the Epic Games Store, the default installation paths will differ. For GOG, check C:\GOG Games\Solasta2. Regardless of the storefront, the Unity Mod Manager installation process remains identical, as it targets the executable file directly.
Verifying Solasta 2 Custom Portraits Paths
It is important to distinguish between 3D meshes and 2D images. While a 3D face mesh replacement alters the actual 3D model, solasta 2 custom portraits are simply 2D PNG files. These do not require Unity Mod Manager and can be dropped directly into the native \Portraits folder created by the game.
Keep in mind that Windows hides the AppData folder by default. To access your save files and portrait folders, you will need to open your File Explorer view settings and check the box for ‘Hidden items.’ This is a crucial step that trips up many first-time modders.
Pro Tip
If the Mods folder doesn’t appear after installing UMM, launch the game to the main menu, close it, and check the directory again.
Solasta II Early Access Version Differences
Game updates during Early Access frequently alter character models and asset bundles, which will instantly break any installed character creation mod. According to Steam data, the game has already reached up to 20,000 owners, meaning community bug reports surface quickly when a patch drops. Always check version compatibility before modding.
In my testing with the March 12 launch build, a minor hotfix immediately broke my custom portraits and face meshes. This is the reality of Early Access gaming. Developers are constantly tweaking the underlying code, which means mod authors have to play a never-ending game of catch-up.
Why Solasta II Patches Break Cosmetic Mods
Because the game utilizes the Unity engine, developers frequently repackage asset bundles during optimization passes. When this happens, the internal file IDs change. If your custom head mesh tries to reference an old ID, the game will fail to load the mesh, resulting in visual glitches or crashes.
To mitigate this, I highly recommend turning off automatic updates for Solasta II in Steam. Right-click the game, go to Properties, select Updates, and choose ‘Only update this game when I launch it.’ This gives you a buffer window to check Nexus Mods and see if your favorite face packs have been updated before you commit to the new patch.
Checking Solasta 2 Nexus Mods Compatibility
Before downloading any solasta 2 nexus mods, check the ‘Last Updated’ date on the mod page. Compare this to the latest patch notes on Steam. If the game updated on March 13, but the mod was last updated on March 12, it is highly likely the mod will cause instability. Read the community posts section to see if other players report issues with the current build.
Best Solasta 2 Character Creation Mods to Try First
While the Nexus Mods page is still growing during this Early Access period, a few standout packs have already caught my eye. The community has wasted no time in porting over popular tabletop aesthetics to give players more diverse options for their custom parties.
High Fantasy Heads Pack
This is currently the most downloaded aesthetic enhancement tool on the Nexus. It adds 15 new high-quality face meshes that blend perfectly with the vanilla art style. The creator specifically focused on adding more rugged, battle-scarred options for martial classes, which was a major pain point in the base game.
NPC Hair Unlocker
While not strictly a face mod, this is an essential companion download. Tactical Adventures created several unique hairstyles for story NPCs that are normally hidden from the player. This mod simply flips a flag in the game’s code to make those assets available in the character creator, drastically expanding your customization options without requiring complex mesh injections.
Practical Test: Viewing New Solasta II Faces
You can verify your mod installation immediately by launching a new campaign and entering the character creator. In testing, the new cosmetic files appear seamlessly alongside vanilla options in the race and appearance tabs, provided the solasta 2 mod for more character faces loaded correctly through the mod manager.
Accessing the Solasta II Character Creator
Start the game and select ‘New Campaign’ or ‘Character Pool’ from the main menu. Proceed through the race and class selection until you reach the ‘Appearance’ tab. Here, you should see new slider options or an expanded grid of face presets. If the solasta 2 mod for more character faces is active, the new meshes will seamlessly replace or append to the vanilla list.
Pay close attention to the lighting in the character creator. Sometimes, custom meshes can look slightly different under the harsh camp lighting compared to the neutral creator background. I recommend rotating the character model fully to ensure there are no weird neck seams or texture stretching before finalizing your hero.
Mixing Solasta 2 Character Creation Mods
For the ultimate role-playing experience, consider combining your new faces with other solasta 2 character creation mods. Many players use mods that unlock NPC-exclusive hairstyles or expand the color palettes for skin and eyes. Ensure that these additional cosmetic mods do not conflict by checking their load order in UMM.
Why Do Solasta II Cosmetic Mods Stop Working?
Most visual glitches in Solasta II stem from outdated mod versions or conflicting cosmetic overrides. If your character’s head disappears or textures fail to load, it usually means the installed face mod is incompatible with the current game patch. Steam statistics show an average playtime of 1.2 hours, which is exactly when players usually start noticing these mid-campaign visual bugs.
Fixing the Solasta II Invisible Head Glitch
The notorious ‘invisible head’ glitch occurs when the game engine cannot find the 3D mesh referenced by your save file. To fix this, open Unity Mod Manager and ensure the mod is toggled ‘On.’ If the game recently updated, you must wait for the mod author to release a patch, or temporarily revert your game version using Steam’s Beta tab.
If you are still experiencing issues, check the ผู้เล่น.บันทึก file located in your AppData folder. This text file records every error the Unity engine encounters. Searching for ‘Exception’ or ‘Missing Asset’ in this document can quickly pinpoint exactly which mod is causing the invisible head glitch.
Resolving Solasta 2 Cosmetic Mods Conflicts
Installing multiple solasta 2 cosmetic mods that alter the same base game files will cause conflicts. If you have two different face packs installed, they may attempt to overwrite the same asset bundle. Open UMM, disable one of the conflicting mods, and restart the game to see if the textures render correctly.
As a last resort, you can clear the UMM cache and verify the integrity of your game files through Steam. This will restore the vanilla asset bundles. You will then need to reinstall UMM and your mods from scratch, but this clean slate approach resolves 99% of persistent texture conflicts.
Final Verdict
Finding the right character customization mod elevates your D&D CRPG experience by bringing your tabletop visions to life. While modding during Early Access requires some patience with frequent updates and version matching, the visual payoff is well worth the initial setup. By utilizing Unity Mod Manager, keeping your files organized, and always backing up your saves, you can safely experiment with the growing library of community creations. As the game matures toward its full release, expect even more robust tools and expansive cosmetic packs to become available.
Enhance Your Custom Characters Further with XMODHUB
Looking to bypass the Early Access grind and focus entirely on your custom party’s story? XMODHUB offers a seamless, all-in-one solution for safely enhancing your Solasta II experience.
❤️ โหมดพระเจ้า
Keep your custom characters alive through punishing tabletop encounters.
💰 ทองไม่จำกัด
Purchase the best gear and magical items instantly.
📈 ประสบการณ์สูงสุด
Level up your party instantly to unlock high-tier spells.
⚔️ Unlimited Spell Slots
Cast powerful magic without resting at campfires.
Why Choose XMODHUB for Solasta II
XMODHUB is the trusted choice for single-player PC gamers because it eliminates the hassle of manual mod installations and complex folder routing. Unlike traditional cheat engines, it is completely malware-free and automatically updates alongside Solasta II’s frequent Early Access patches, ensuring your enhancements never break mid-campaign.
Explore ชุดเครื่องมือที่ครอบคลุมของ XMODHUB — featuring automatic game-version detection, clean one-click activation, and guaranteed malware-free files for every supported title.
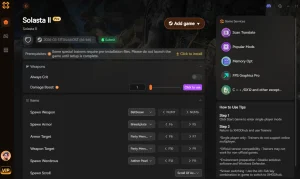
Combat & Health
- โหมดพระเจ้า – Grants infinite health to your entire party.
- Unlimited Spell Slots – Never run out of magic during intense battles.
Progression & Wealth
- ทองคำไม่จำกัด – Add unlimited currency to your party inventory.
- Max Experience – Instantly reach the current Early Access level cap.
คำถามที่พบบ่อย
พร้อมที่จะยกระดับการเล่นเกมของคุณหรือยัง?
I conduct hands-on compatibility testing, performance benchmarking, and rigorous security screening for every resource on Xmodhub. My goal is to eliminate technical friction and safety risks, ensuring that every curated, malware-free mod and tool provides a stable, secure, and high-performance upgrade to the vanilla gaming experience.