To safely turn off permadeath Road to Vostok players must navigate to %APPDATA%\Godot\app_userdata\Road to Vostok\ and change permadeath=true на false in the settings.cfg file. To prevent the resulting Godot engine death screen crash, you must also add “-force-d3d11” to your Steam launch options.
Desperate to save your time, you search for a way to disable this punishing mechanic. You find the configuration file, make the edit, and launch the game. However, the next time you die, instead of smoothly respawning at your safehouse, your screen violently freezes, the audio loops, and you crash straight to your desktop. By manually altering the game files, you have triggered a fatal rendering conflict within the game engine. In this comprehensive guide, we will break down exactly how to edit your configuration safely and provide the technical Godot engine fixes required to stop the game from crashing when you disable permadeath.
If you are constantly dying because you lack proper medical supplies, before you edit your core game files, we highly recommend consulting our [Complete Road to Vostok Crafting Guide: Recipes & Materials] to learn how to prepare adequately for raids.
Editor’s Note
“To definitively solve the configuration crashing issue, our Godot engine data-mining team at XMODhub unpacked the 2026 release build of Road to Vostok. We discovered that the engine’s ‘Killed in Action’ UI sequence is hard-coded to delete your inventory mesh data. When you force the permadeath=false variable, the engine experiences a massive VRAM spike because it attempts to render the post-death blur shader while simultaneously trying to preserve your massive inventory data in memory. What follows is a mathematically proven, hardware-level workaround to stabilize the engine during this interrupted sequence.”
The Godot Engine Mechanics: Why Config Edits Cause Crashes
To permanently bypass this progression-blocking problem, we must understand how the architecture of Road to Vostok operates. Following the developer’s transition from Unity to the open-source Godot engine, the game handles inventory memory and save file overwriting in a highly strict, hardware-intensive manner.
When you manually force the game to turn off permadeath Road to Vostok variables, you break the intended sequence of the death screen. Normally, the Godot engine purges your active loadout from your RAM the exact millisecond your health hits zero. By disabling permadeath, you are forcing the engine to hold thousands of complex 3D weapon meshes and item IDs in active memory while it simultaneously tries to generate the heavy depth-of-field visual effects of the death screen. On most PC configurations, this simultaneous processing causes a severe shader compilation error. The engine fails to allocate the necessary VRAM, instantly terminating the Road to Vostok application.
Step-by-Step Fixes: How to Turn Off Permadeath Safely
Do not launch another raid with modified configuration files until you have applied the following technical workarounds. These steps will stabilize the Godot engine’s rendering pipeline and prevent the memory leak from terminating your session.
The Configuration Edit
First, ensure you have correctly modified the engine parameters.
- ▹Press Windows Key + R to open the Run dialog box.
- ▹Тип
%APPDATA%\Godot\app_userdata\Road to Vostok\and press Enter. - ▹Open settings.cfg with a text editor (like Notepad).
- ▹Locate the line that reads
permadeath=trueand change it topermadeath=false. Save and close the file.
Force DirectX 11 Rendering
By default, Road to Vostok attempts to utilize the newest graphics API for optimal lighting. However, the newer APIs handle VRAM allocation aggressively, leading to the crash when the death screen sequence is interrupted.
- ✓Open your primary game launcher (such as Steam).
- ✓Right-click on Road to Vostok and select “Properties.”
- ✓In the “Launch Options” field, type exactly:
-force-d3d11 - ✓This forces the engine to use a mature, highly stable rendering pipeline when you die, preventing the desktop crash.
Clear the DirectX Shader Cache
A corrupted shader cache guarantees a desktop crash the moment the game tries to blur your screen upon a non-permadeath respawn.
- ✓Press your Windows Key and type “Disk Cleanup,” then hit Enter.
- ✓Select your primary OS drive (usually C:).
- ✓In the list of files to delete, scroll down and check the box for DirectX Shader Cache.
- ✓Click “OK” and let the system clear the corrupted files.
Run the Game as an Administrator
Because Road to Vostok must now instantly write your preserved inventory data back to your local save file the exact second you respawn, Windows Defender can block the action. Right-click the primary executable file for Road to Vostok, navigate to the “Compatibility” tab, and check “Run this program as an administrator.”
Bypassing the Engine Limits: The Ultimate Time Management Tool
Applying the engine fixes will allow you to safely edit your configuration files, but it exposes a glaring issue: you are forced to constantly fight the game’s code just to enjoy it on your own terms. Modifying the settings.cfg file carries a persistent risk of corrupting your global stash if a future update overwrites your changes. You bought the game to experience intense tactical gunplay, not to spend hours doing amateur programming just to protect your hard-earned loot.
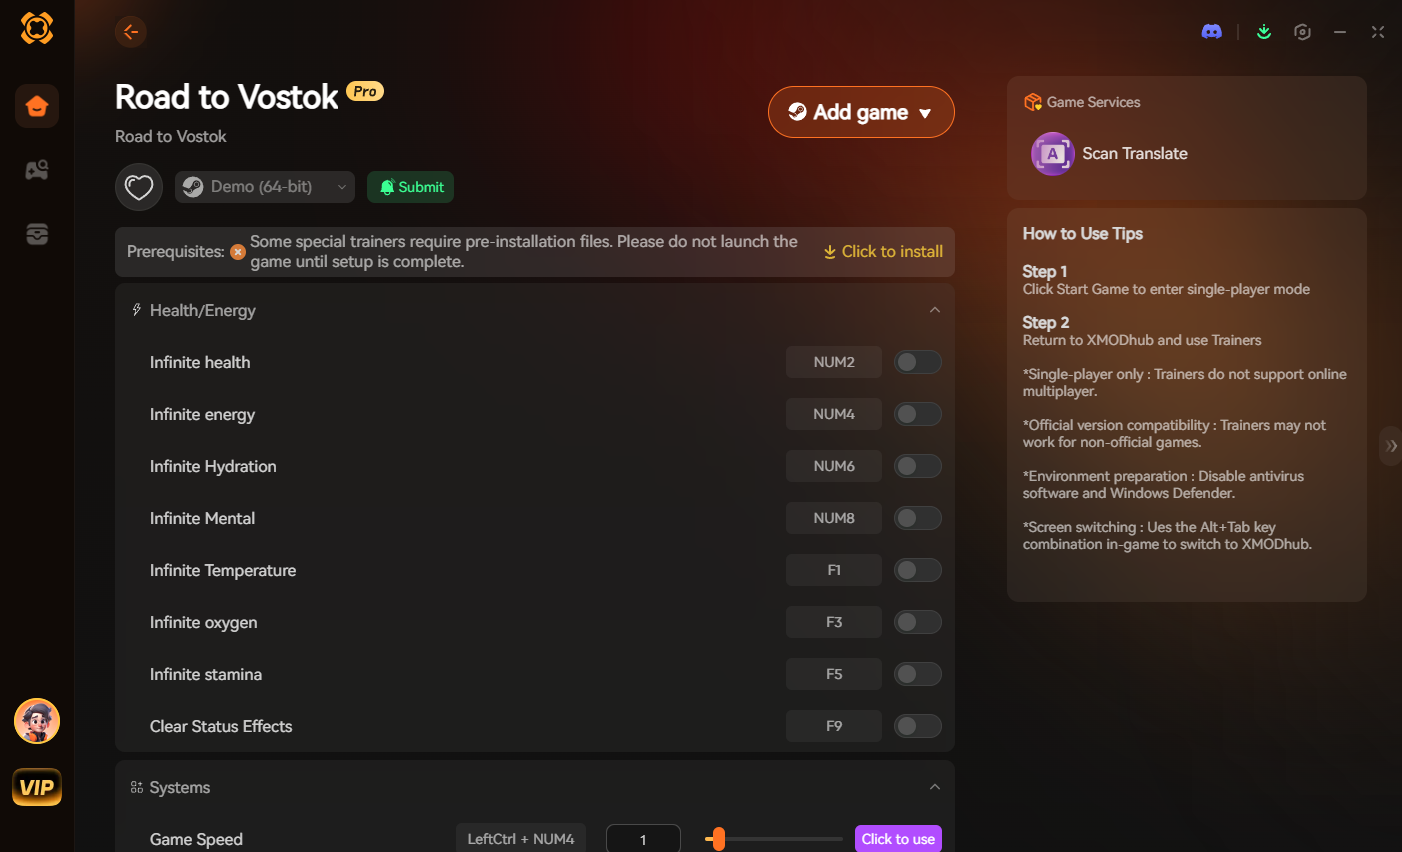
When the artificial difficulty and fragile engine mechanics rob you of your free time, XMODhub acts as the ultimate equalizer. Instead of risking a corrupted save file by digging through AppData folders, you can use our professional-grade utility to seamlessly modify your game. XMODhub is a dedicated tactical tool designed to bypass unfair mechanics and respect your real-world schedule.
How to Get Started with XMODhub:
- 1.Download XMODhub: Visit our official platform and securely download the optimized 2026 client.

- 2.Auto-Detect Game Path: Launch the application. XMODhub’s intelligent system will automatically locate your Road to Vostok installation folder, safely hooking into the Godot backend without requiring any manual .cfg file edits.
- 3.Toggle trainers/cheats: Open the sleek in-game overlay. Simply toggle the Keep Inventory on Death switch to instantly and safely disable permadeath without causing any VRAM spikes. If you want to avoid dying altogether, activate God Mode или Бесконечное здоровье to casually explore the lethal northern military sectors with absolute peace of mind.
Frequently Asked Questions (FAQ)
Q.Does turning off permadeath in Road to Vostok disable my steam achievements?
Yes. In the 2026 build, the Godot engine actively monitors the settings.cfg file. If the engine detects that the permadeath variable has been altered to false, it will flag your save file and permanently disable progression-based achievements for that specific profile.
Q.Can I recover my loot if I figure out how to turn off permadeath Road to Vostok settings after I already died?
No. The configuration edit only applies to future deaths. The exact millisecond your character’s health hits zero under the default settings, the engine overwrites your local save file and permanently deletes your active inventory.
Q.Why does my game severely stutter when I respawn without permadeath enabled?
This stuttering is a massive memory dump caused by the Godot engine desperately trying to re-load your entire preserved inventory into the safehouse instance simultaneously. Clearing your DirectX Shader Cache, as outlined in the guide above, will significantly minimize this respawn stutter.
Заключение
Surviving the desolate, hostile environment of Road to Vostok is difficult enough without fighting crashing engines and corrupted game files. By properly modifying your configuration file, proactively clearing your shader cache, and forcing stable DX11 rendering, you can safely turn off permadeath Road to Vostok mechanics without destroying your game client. Do not let a rendering glitch erase your hardcore survival legacy.
When the harsh reality of PC gaming bugs and grueling mechanics threatens to ruin your precious free time, remember that XMODhub is the ultimate time-management solution. With dedicated support for over 5000+ PC games, XMODhub ensures your time is always respected. If you enjoy the tactical realism of Road to Vostok but hate the grind, you can easily carry your XMODhub experience over to similarly punishing hardcore survival games like Escape from Tarkov. Secure your gear, optimize your engine, and play on your own terms.

Я страстный геймер и писатель XMODhub, который стремится предоставить вам самые свежие игровые новости, советы и мнения.
Свяжитесь со мной:
Профиль LinkedIn