Picture this: You are three kilometers deep into an unexplored biome in Outbound. You have spent the last forty minutes navigating treacherous terrain, dodging environmental hazards, and finally, you stumble upon a rare resource node or a high-tier loot cache. Your heart races. You reach out to grab the prize, and then—the dreaded message pops up on your screen: “Inventory Full.” You look at your pack, filled with low-tier rocks and basic crafting components, and you are forced to make a gut-wrenching decision: what do you throw away? It is the most frustrating moment a player can experience in Outbound, and I have seen countless runs ruined by this exact scenario.
🎒 Editor’s Note
Having sunk over 100 hours into Outbound, I have learned that inventory management is not just a secondary mechanic; it is the core of your survival loop. I have tested every backpack configuration, vehicle attachment, and base storage optimization technique. The methods below are the result of rigorous, high-level trial and error designed to turn you from a pack-rat into a logistical master.
⚡ TL;DR: The Short Answer
If you are looking for the fastest ways to increase your carrying capacity in Outbound, refer to the table below for immediate solutions:
| Metodo | Efficiency Gain | Requirement |
|---|---|---|
| Backpack Tier Upgrades | Alto | Mid-Game Tech Tree |
| Vehicle Storage Modules | Molto alto | Vehicle Fabrication |
| Portable Storage Crates | Medio | Basic Crafting |
| Inventory Management Skills | Passive | Skill Tree Points |
⚠️ Common Inventory Mistakes in Outbound
Before we dive into the “how-to,” let’s talk about why you are running out of space in the first place. Most players in Outbound fall into the same traps. The most common mistake is “hoarding syndrome.” You pick up every single resource you see, regardless of whether you need it for your current crafting tier. In Outbound, resource density varies wildly. If you are hauling stacks of basic wood when you are deep in a late-game zone, you are wasting precious inventory slots that could be occupied by high-value alloys or rare components.
Another frequent error is failing to utilize the vehicle storage effectively. Many players treat their vehicle as a simple transport device, ignoring the fact that it is a mobile warehouse. If you are walking everywhere and carrying everything on your back, you are playing Outbound at 20% efficiency. You need to shift your mindset from “What can I carry?” to “What can I transport?”
🎒 Proven Methods to Increase Inventory Space
To truly maximize your storage in Outbound, you need to approach the problem from three angles: personal capacity, mobile transport, and stationary base management.
1. Backpack Tier Upgrades
Your personal backpack is your primary interface with the world of Outbound. Do not settle for the starter pack. Prioritize the research nodes that unlock expanded carrying capacity. In the early game, focus on the “Reinforced Straps” upgrade. This is a cheap, early-game investment that provides a flat increase to your maximum weight allowance. As you progress, look for specialized tactical packs that offer weight reduction for specific resource types, such as ore or organic materials.
2. Vehicle Storage Modules
This is where the real magic happens. Outbound is designed around the vehicle ecosystem. You should be installing external storage racks on your vehicle as soon as you unlock them. These racks don’t count towards your personal weight limit. By strategically placing storage containers on your vehicle, you effectively turn your transport into a mobile base. Always ensure you have at least one slot dedicated to “overflow” items that you pick up during your expeditions.
🗺️ Strategic Resource Management
Inventory management is not just about having more space; it is about knowing where to put the resources you have. Many players struggle because they are trying to bring everything back to a single hub. This is inefficient. You should be establishing mini-outposts and using the map to track your resource distribution. Before you head out to clear your inventory or plan your next major expedition, you need to know where the best loot is. Check out our Outbound Map Guide: All Resource & Biome Locations (2026) to optimize your travel routes and ensure you are only carrying what you actually need for the specific biome you are visiting.
📦 Alternative Storage Solutions
If you find yourself constantly capped, you need to think outside the box. Here are two alternative methods that veteran Outbound players use to bypass the standard limitations:
The “Cache Drop” Strategy
If you are exploring a dangerous area and your inventory is full, do not just drop items on the ground where they might despawn. Instead, build a simple, cheap “Cache Crate.” These are small, low-cost structures that you can build in almost any biome. Mark the location on your map, dump your excess resources, and come back with your vehicle later to collect them. This effectively gives you infinite inventory space across the entire map of Outbound.
Resource Compressing
Always keep an eye on the crafting bench. Some items, when crafted into their refined state, take up less space than their raw materials. For example, compressing raw ores into ingots is a classic way to save space. Always carry a portable crafting kit if the game mechanics allow, so you can refine your loot on the go, effectively “creating” more space in your backpack without actually increasing your capacity.
🧠 Advanced Player Tips for Min-Maxing
For those who want to play Outbound at the highest level, inventory management is a game of math. Use a “Priority System” for your items. Assign a value to every item based on its rarity, crafting necessity, and ease of acquisition. If you are in the field and need to make space, never drop high-value, rare items. Instead, jettison low-value, common items that can be found in the starting zone. You can always get more wood or stone, but you cannot always get a rare engine component or specialized alloy.
Furthermore, learn to balance your weight. If you are over-encumbered, your movement speed drops, making you a target for enemies and environmental hazards. It is often better to make two trips to a high-value resource node than to try to carry everything at once and get killed on the journey home. Speed is life in Outbound.
📝 The Ultimate Expedition Inventory Checklist
To ensure you never waste a trip, use this prioritized checklist before leaving your main base. This ensures you have the essentials for survival while keeping maximum space available for high-tier loot.
| Item Category | Priority | Reasoning |
|---|---|---|
| Survival Consumables | Critical | Keep minimum viable food/meds only. |
| Portable Crafting Kit | Alto | Allows on-site refining to save weight. |
| Repair Tools | Alto | Prevents being stranded due to gear failure. |
| Building Mats (Wood/Stone) | Basso | Gather locally; do not carry from base. |
Emergency Over-encumbrance Protocol
If you find yourself stuck in the field, follow this step-by-step protocol to regain mobility quickly:
🚀 The QoL Solution: XMODhub
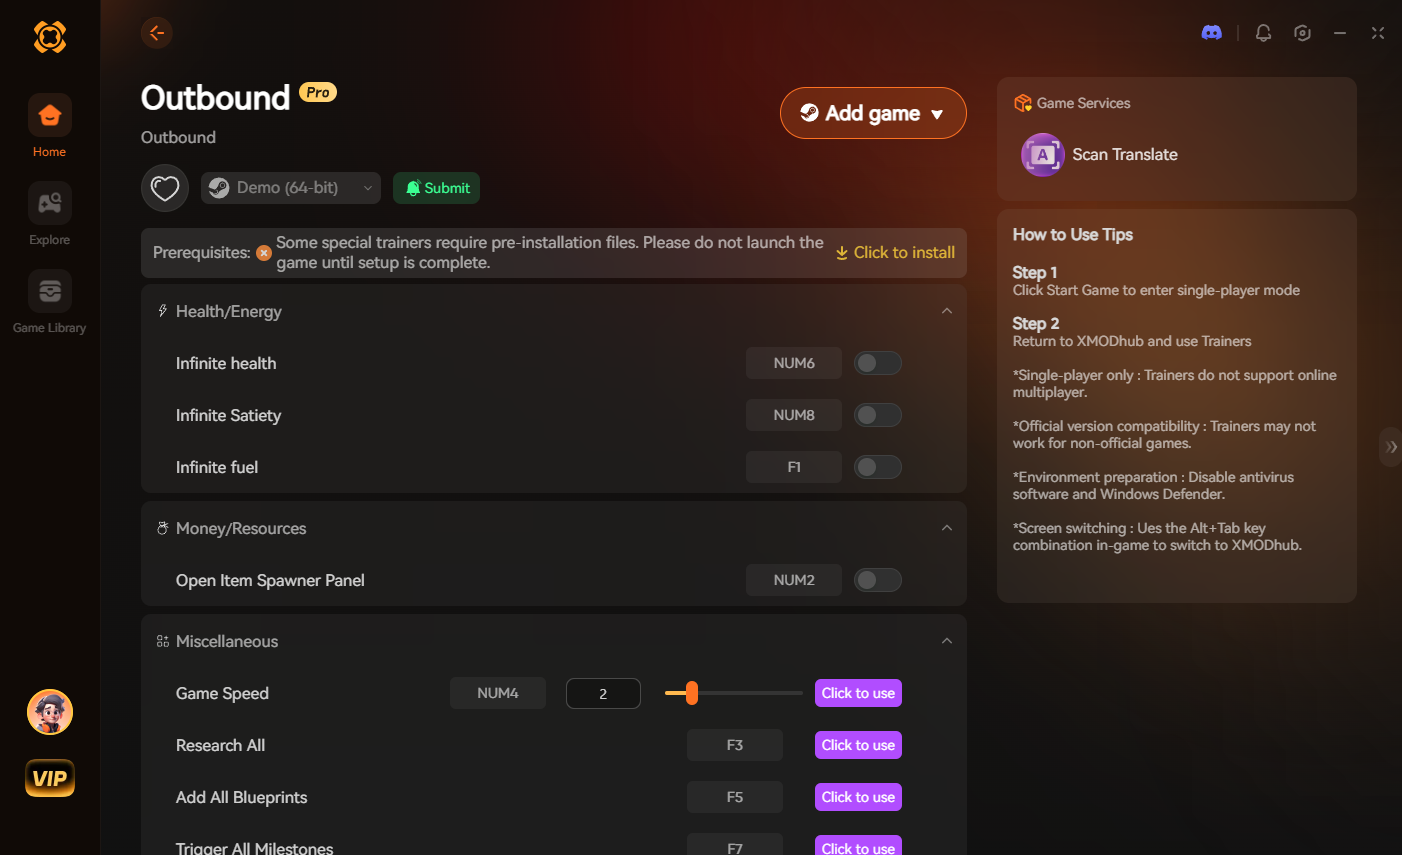
We all love the challenge of Outbound, but sometimes the “grind” of inventory management becomes more of a chore than an engaging gameplay loop. If you have already mastered the mechanics and just want to enjoy the exploration and building aspects of Outbound without constantly managing your backpack, XMODhub is the ultimate solution. XMODhub offers Quality of Life (QoL) features that remove the tedious aspects of inventory management, such as infinite carry weight or infinite resource stacks, allowing you to focus on the fun parts of the game.
Getting started with XMODhub is incredibly simple and takes less than a minute:

💬 Frequently Asked Questions
A: Yes. In Outbound, being over-encumbered will significantly reduce your movement speed and stamina regeneration. Always aim to stay below your maximum weight capacity to remain agile.
A: Yes, there are many community mods available, but for a stable and integrated experience, we recommend using XMODhub to manage your inventory settings, as it is safer and more reliable than manual modding.
A: Use the “Cache Drop” method. Build small, temporary storage containers in secure locations to store excess loot and pick it up later with your vehicle.
A: Early game, prioritize backpack upgrades. Once you reach the mid-game and have access to vehicles, shift your focus entirely to vehicle storage modules, as they offer significantly more capacity.
🌟 Final Verdict: Mastering Inventory in Outbound
Managing your inventory in Outbound is the difference between a successful expedition and a wasted trip. By utilizing backpack upgrades, leveraging vehicle storage, and employing smart strategies like Cache Drops, you can effectively eliminate the frustration of being over-encumbered. Remember, the game is meant to be enjoyed, not just managed. If you find the inventory limits are preventing you from exploring the massive world of Outbound to its fullest, don’t be afraid to use tools like XMODhub to streamline your experience.
XMODhub supports over 5,000 games, including other survival giants like Subnautica, providing a consistent, high-quality experience across your entire gaming library. Take control of your inventory today, optimize your resource logistics, and get back to the true core of Outbound: exploring the unknown.

Sono un giocatore appassionato e uno scrittore di XMODhub, che si dedica a fornire le ultime notizie, consigli e approfondimenti sui giochi.
Collegatevi con me:
Profilo LinkedIn