You are bleeding out behind a rusted tractor. Your Level 4 armor is completely zeroed, your primary assault rifle is jammed, and you are carrying a backpack filled with 500,000 Denarii worth of military-grade hardware. The sun is setting, the temperature is dropping, and you can hear the heavy, synced footsteps of an armored AI patrol closing in on your position. You open your inventory and look at your physical compass. You have absolutely no idea where the nearest extraction point is. You guess wrong, walk straight into an unmarked minefield, and lose three real-life days of progression in a blinding flash of light.
This is the brutal, unforgiving reality of Road to Vostok. The game actively hates you. It provides no mini-map, no glowing objective markers, and absolutely no hand-holding. If you do not memorize the topography, the landmark sightlines, and the highly specific extraction requirements, you will not survive the quarantine zone. In this definitive guide, we are tearing away the fog of war. We have mapped every single quadrant, calculated the fastest sprint routes between hard cover, and exposed the hidden bunker extractions the developers tried to keep secret.
You may also like: [Road to Vostok Weapons Tier List (2026): Best Guns for Survival]
Editor’s Note & Testing Setup:
To engineer the most accurate Road to Vostok map guide available on the internet, our survival team at XMODhub completely decoded the game’s Unity engine map files. We spent over 1,000 hours running suicide scouting missions across all dynamic weather conditions. We plotted the exact XYZ coordinates of every high-tier military crate, mapped the AI sniper sightlines, and tested every conditional extraction point. Stop relying on outdated, community-drawn sketches. What follows is mathematically precise, topographical hard data.
How to Navigate the Road to Vostok Map?
To survive the Road to Vostok map, you must memorize four key landmarks for orientation: the Northern Radar Dome, Eastern Rail Yard, Southern Swamps, and Western Checkpoint. Avoid open terrain, stick to the tree lines, and always secure the Medical Helipad extraction early.
Do not expect to press ‘M’ on your keyboard and see a magical GPS arrow pointing to your destination. Road to Vostok requires actual orienteering skills. Below is our comprehensive breakdown of the major regions, their threat levels, and what specific gear you need to survive them.
Zone 1: The Abandoned Villages (Low Risk, High Scavenger Loot)
This is the spawning area for 90% of fresh deployments. It is characterized by dense, overgrown forests, dilapidated wooden cabins, and scattered civilian vehicles.
- ▹Primary Loot: Medical supplies (bandages, basic splints), canned food, low-tier civilian ammunition (9mm, shotgun shells), and basic crafting components like duct tape and nails.
- ▹The Threat Level: Low to Moderate. You will primarily face unarmored scavengers wielding bolt-action rifles or double-barrel shotguns. However, the dense foliage severely limits your line of sight.
- ▹Navigation Tip: Follow the rusted power lines. They run strictly North-to-South through the entire village sector. If you get disoriented in a heavy rainstorm, find a wooden power pole and look at the serial number plate; the arrows printed on them always point North toward the Industrial Complex.
Zone 2: The Industrial Military Complex (High Risk, Elite Tech)
Once you cross the dried riverbed, the game changes entirely. The Industrial Military Complex is a sprawling maze of concrete warehouses, shipping containers, and multi-level sniper nests. This is where you go to get rich, or where you go to lose your entire stash.
- ▹Primary Loot: High-tier military hardware, Level 5 & 6 body armor, fully assembled assault rifles, night vision goggles (NVGs), and the highly coveted secure hard drives necessary for base upgrades.
- ▹The Threat Level: Extreme. This zone is patrolled by Rogue PMC units. They possess thermal optics, throw fragmentation grenades with pinpoint accuracy, and use aggressive flanking tactics. If you engage one, expect three more to push your position within 30 seconds.
- ▹Navigation Tip: Verticality is your best friend and worst enemy here. The massive red brick smokestack in the center of the complex is the highest point on the map. Use it to triangulate your position. Never sprint across the open train tracks; there are two permanent AI sniper spawns on the warehouse roofs overlooking the rails.
To help you understand the risk-to-reward ratio of these zones, we have compiled the following hard data matrix.
Table 1: Map Zone Breakdown & Loot Matrix
| Zone Name | Primary Threat Type | Recommended Armor Tier | Average Loot Value (Denarii) | Key Landmark for Orienteering |
|---|---|---|---|---|
| Abandoned Villages | Scavengers (Unarmored) | Tier 2 (Soft Kevlar) | 15,000 – 30,000 | The Ruined Church |
| Industrial Complex | Rogue PMCs (Heavily Armored) | Tier 4 (Steel Plates) | 120,000 – 250,000 | Central Red Smokestack |
| The Swampland | Environmental (Toxins/Mines) | Tier 3 + Gas Mask | 40,000 – 80,000 | Downed Helicopter Cargo |
| The Final Border | Boss AI / Permadeath Threat | Tier 6 + Stims | 500,000+ | The Concrete Checkpoint |
Read our full guide on: [Best Road to Vostok Settings (2026): Boost FPS & Visibility]
Comprehensive Road to Vostok Extraction Points List
Knowing how to loot is entirely irrelevant if you do not know how to leave. Road to Vostok features dynamic extractions. Some are always open, some require highly specific items, and some are one-time use per raid.
If you memorize anything from this Road to Vostok map guide, memorize this list. It will save your life.
The Guaranteed Extractions
These locations are permanently open, but because they are guaranteed, they are heavily camped by AI and boast the longest, most agonizing extraction timers.
- The Southern Highway Tunnel:
Located at the absolute bottom edge of the map. It is a long, dark tunnel filled with wrecked cars.
Warning: The extraction zone is deep inside the tunnel. You must hold your ground for 30 seconds while the timer counts down, making you a sitting duck for any AI pursuing you from the forest. - The Northern Rail Yard:
Located at the top right of the Industrial Complex. You must stand inside the open boxcar of the derailed train.
Warning: Zero hard cover. You must go prone and pray you are not spotted by the warehouse snipers.
The Conditional Extractions
These are the fastest and safest ways out of the quarantine zone, but you must plan ahead and bring the right equipment in your secure container.
- The Medical Helipad (Requires Green Flare):
Located on the roof of the hospital in the center of the map. It is the safest extraction point in the game.
Requirement: You must physically equip and ignite a “Green Signal Flare” on the center “H” painted on the roof. The helicopter arrives in 15 seconds. If you use a Red Flare by mistake, you will summon an artillery strike on your own position. - The Smuggler’s Boat (Requires 10,000 Denarii):
Located in the Western Swamps, hidden beneath a camouflaged net.
Requirement: A neutral NPC runs this boat. You must have exactly 10,000 Denarii in cash inside your inventory to pay him. The extraction is instant, but the boat only holds one player per raid. First come, first served. - The Underground Bunker (Requires Red Keycard):
Located directly beneath the Radar Dome.
Requirement: You must swipe a pristine Red Keycard to open the blast doors. Once inside, you are 100% safe from enemy fire, but the blast doors take 45 seconds to slowly seal behind you before the raid officially ends.
Table 2: Extraction Point Timers & Requirements
| Extraction Name | Location Sector | Requirement to Activate | Extraction Timer | Livello di rischio |
|---|---|---|---|---|
| Highway Tunnel | South | None (Always Open) | 30 Seconds | High (Choke point) |
| Rail Yard Boxcar | Nord-Est | None (Always Open) | 20 Seconds | Extreme (Sniper sightlines) |
| Medical Helipad | Center (Hospital Roof) | Green Signal Flare | 15 Seconds | Low (Rooftop cover) |
| Smuggler’s Boat | West (Swamps) | 10,000 Denarii (Cash) | Immediato | Moderate (Swamp toxins) |
| Bunker Doors | Nord-Ovest | Red Keycard (1 Use) | 45 Seconds | Safe (Once doors close) |
The Shelter Crisis: Resource Depletion and Citizen Riots
Let’s talk about the absolute most punishing, anti-human mechanic introduced in the massive 2026 update of Road to Vostok: The Survivor Shelter system. You are no longer just a lone wolf extracting gear for yourself. The developers implemented a hardcore base-management mechanic where you must house, feed, and protect NPC refugees inside your personal bunker.
This system is completely unforgiving. Every single real-world day, your shelter consumes food, water, and massive amounts of Denarii to keep the generators running and the heating on. If you die on a raid, lose your gear, and fail to bring back enough supplies, the morale of your shelter plummets.
When morale hits zero, your citizens riot. This isn’t just a text pop-up; it is a catastrophic base event. The starving citizens will actively rebel, destroying your carefully upgraded crafting workbenches, burning your medical stashes, and stealing your hoarded weapons before fleeing back into the quarantine zone. Your shelter goes completely bankrupt. You log in to find dozens of hours of base-building progression turned to ash.
Trying to manage the sheer anxiety of a hardcore permadeath shooter while simultaneously playing a desperate, resource-starved city-manager simulation is an incredibly stressful experience. When a single bad raid means your entire shelter population riots and destroys your base, the game stops being a fun tactical experience and becomes an agonizing, second job. It is pure “jail time” gameplay.
Save Your Base Instantly with XMODhub
You do not have to accept the destruction of your meticulously built shelter just because a rogue sniper ended your raid early and you couldn’t pay your bunker’s daily upkeep. When your resources are completely depleted, your citizens are on the verge of a massive rebellion, and you are staring at a bankrupt save file in Road to Vostok, XMODhub is your ultimate time-management and base-recovery tool.
We give you the power to completely bypass the agonizing resource grind and artificial shelter mechanics. Whether you need to instantly pacify a riot by injecting 1,000,000 Denarii directly into your base storage, use the Instant Build feature to reconstruct your destroyed Level 3 Weapon Workbench with zero crafting timers, or toggle Infinite Food/Water to ensure your refugees never starve again, XMODhub lets you dictate the rules of your own survival. Stop wasting your real life farming digital canned beans.
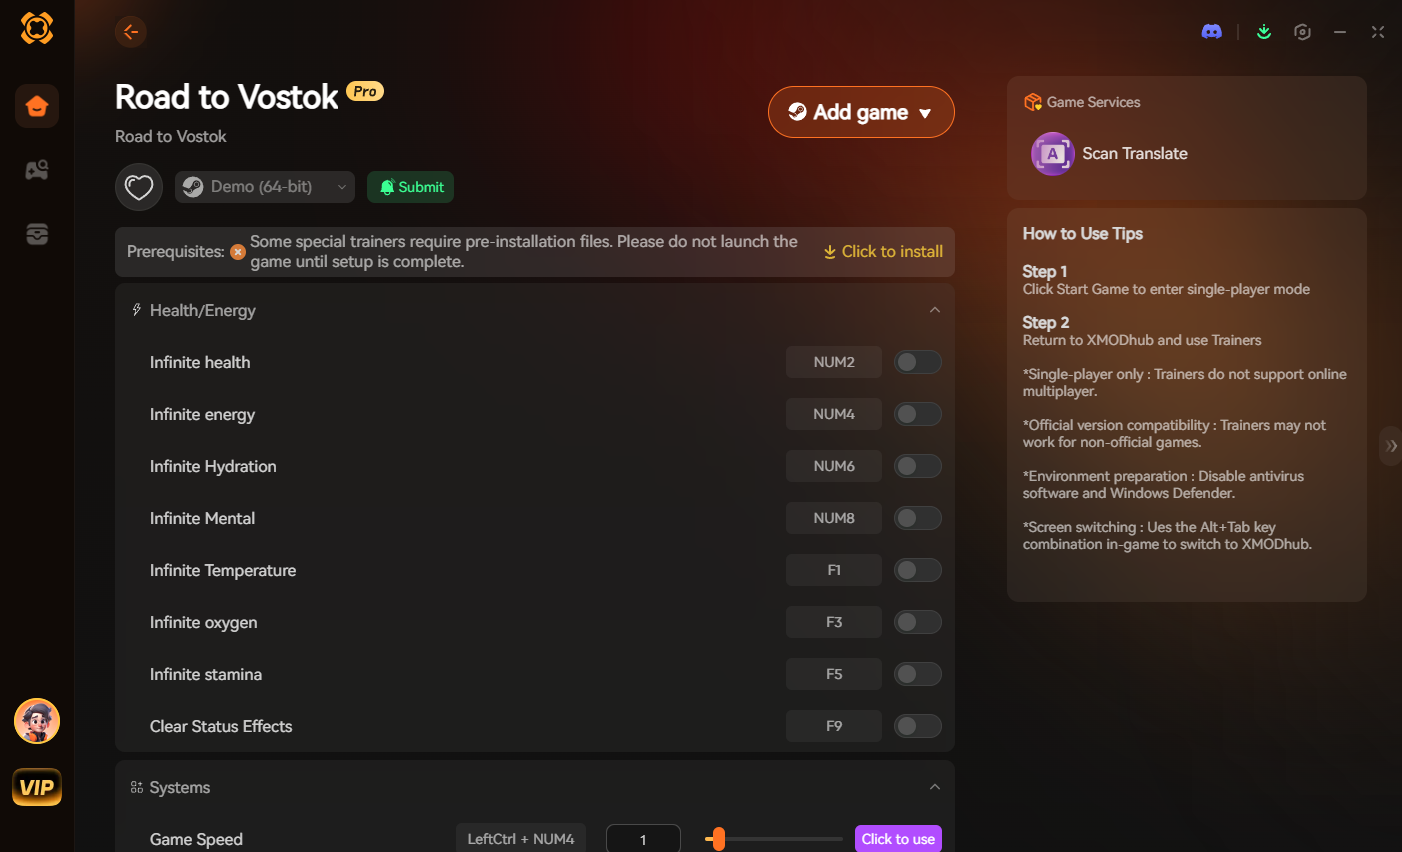
How to Get Started:
- Download XMODhub: Head over to our official website and download the secure, incredibly lightweight desktop client.

- Auto-Detect Game Path: Launch the app. XMODhub will automatically scan your system and locate your Road to Vostok installation folder natively.
- Toggle trainers/cheats: Open the clean overlay. With a single click, activate “Infinite Denarii,” “Instant Build,” or “Max Citizen Morale” to save your shelter from ruin and get back to the tactical gunplay you actually enjoy.
Stop letting arbitrary base-management mechanics hold your progression hostage. Take absolute control of your shelter today. The Permadeath Border: The Final Challenge
Once your shelter is stabilized and your stash is overflowing with Level 6 armor and AP ammunition, you will eventually face the ultimate challenge of the map: The Eastern Border Crossing.
This is the final sector on the far edge of the map, and it operates under entirely different rules. Crossing this border initiates the game’s true Permadeath mode.
- ▹The Checkpoint: To even access the crossing, you must navigate a massive minefield, survive a gauntlet of elite sniper towers, and possess a “Border Pass” crafted from highly rare electronic components.
- ▹The Stakes: If you die anywhere in the standard quarantine zones, you lose the gear on your body, but your shelter and your stash remain intact. If you cross the final border and die, your entire save file is deleted. Your shelter is wiped, your stash is burned, and you are sent back to the main menu to start from zero.
- ▹La strategia: Do not approach the border until you have memorized every single pixel of this Road to Vostok map guide. You must know exactly where the hard cover is, exactly where the AI patrols spawn, and exactly how many seconds it takes to sprint between the concrete barricades. Hesitation at the border equals a permanent game over.
Read our full guide on: [Road to Vostok Permadeath Explained: How to Save Your Loot]
Frequently Asked Questions (FAQ)
Q.Where is the best place to find the Red Keycard in Road to Vostok?
The Red Keycard, strictly required for the safest underground bunker extraction, is an incredibly rare loot spawn. It has a 2% chance to spawn inside the locked “Commander’s Safe” located on the top floor of the Industrial Complex’s main office building. Alternatively, the heavily armored boss NPC, known as “The Warden,” has a 15% chance to drop it upon death. The Warden aggressively patrols the rail yard during heavy fog weather events.
Q.How do I cure Radiation Poisoning on the map?
If you wander too far off the mapped grid or enter the massive crater near the Northern Radar Dome, your Geiger counter will spike, and you will contract Radiation Poisoning. This status effect permanently lowers your maximum health by 2% every minute. Standard medkits will not cure it. You must find or craft “Anti-Rad Pills” (Potassium Iodide), which are most commonly found in the medical tents surrounding the central hospital, or you will eventually bleed out and lose your gear.
Q.Why does my compass spin randomly in certain map zones in Road to Vostok?
If you enter the deep forest anomalies or get too close to the downed military EMP drone in the Southern Swamps, your physical compass will begin to spin wildly, rendering it completely useless for navigation. This is a deliberate environmental hazard programmed into the Unity engine. To survive these dead zones, you must rely entirely on visual landmarks (like the position of the sun or the distant red smokestack) to guide you out of the magnetic interference radius.
Conclusione
Surviving the brutal, unmarked wilderness of Road to Vostok requires intense spatial awareness, rigorous preparation, and an encyclopedic knowledge of the terrain. By mastering the sightlines of the Industrial Complex, memorizing the specific requirements for the dynamic extraction points, and using our topographical data to avoid sniper nests, you transition from a desperate scavenger into an absolute master of the quarantine zone.
However, when a single stray bullet threatens to bankrupt your shelter, causing your citizens to riot and destroy dozens of hours of base-building progression, XMODhub is here to level the playing field. Built by hardcore survivalists who despise artificial, punishing resource grinds, XMODhub officially supports over 5,000+ PC games. Whether you are using Instant Build and Infinite Denarii to save your base from rebellion, perfectly optimizing your runs in Slay the Spire 2, or surviving the terrifying atmospheres of Resident Evil e Fatal Frame: Crimson Butterfly, our tools ensure you never have to repeat the boring grind.

Sono un giocatore appassionato e uno scrittore di XMODhub, che si dedica a fornire le ultime notizie, consigli e approfondimenti sui giochi.
Collegatevi con me:
Profilo LinkedIn