Quick Answer: TL;DR: The Short Answer
To successfully protect your mining fleet in Starminer, you must implement a multi-layered defense strategy rather than relying on a single massive weapon. Here is the optimal blueprint for fleet survival:
Editor’s Note
After logging over 100 hours in Starminer, designing everything from nimble scout fighters to massive, heavily armored dreadnoughts, I have learned that defense is a proactive science, not a reactive panic. I have lost millions of tons of titanium testing what works and what fails spectacularly. This guide is the culmination of those brutal lessons, designed to transform your fragile mining rigs into untouchable, heavily armed fortresses.
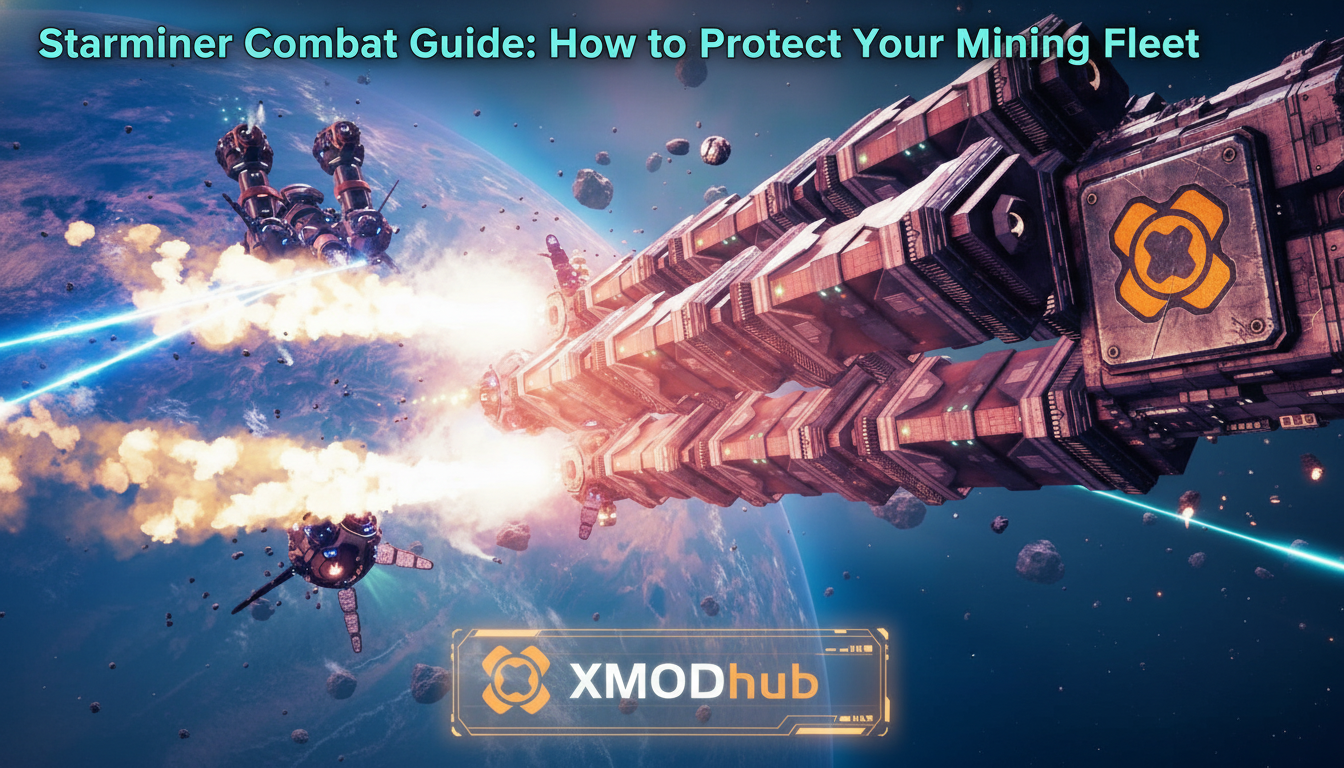
You just spent four painstaking hours meticulously carving out a massive, resource-rich asteroid, your cargo holds are bursting with rare ores, and you are finally ready to head back to base. Suddenly, the radar pings—a massive alien swarm drops out of warp, bypasses your single, poorly-placed laser turret, and detonates your main reactor, instantly vaporizing half a day of hard work. If this catastrophic scenario sounds painfully familiar, you are not alone. Surviving the hostile vacuum of space in Starminer requires far more than just slapping a few guns onto a flying brick; it demands a fundamental understanding of naval architecture, threat prioritization, and fleet synergy.
Mechanics Deep Dive: The Anatomy of a Surviving Ship
In Starminer, combat is heavily physics-based and relies deeply on the voxel construction system. Damage is not just a health bar; it is localized, structural, and often catastrophic if a critical module is hit. Protecting your fleet means understanding how armor, heat, and power interact under extreme duress.
Common Mistakes That Will Get Your Fleet Destroyed
Before we can build an impenetrable fortress, we must address the fatal engineering flaws that plague 90% of new players in Starminer.
The most egregious error is the \”Glass Cannon\” design. Players often focus entirely on maximizing mining yield and cargo space, leaving their ships as massive, slow-moving targets with zero defensive plating. They slap a single heavy laser cannon on the roof, assuming it will handle any threat. The problem? Heavy lasers have abysmal tracking speeds. When a swarm of nimble alien interceptors swarms a glass cannon, the heavy laser cannot rotate fast enough to hit them, resulting in the ship being slowly dismantled piece by piece.
Another massive oversight is centralized power routing. Players frequently connect their defensive turrets, mining lasers, and thrusters to the same primary reactor without battery buffers. When an ambush occurs while you are actively mining, your power draw is already at 99%. The moment your turrets attempt to fire, the entire grid trips, leaving you dead in the water—no engines, no guns, no escape.
Lastly, players constantly ignore firing arcs. Placing all your turrets on the dorsal (top) side of your ship leaves the ventral (bottom) side completely blind. In the fully 3D space of Starminer, alien AI is programmed to exploit these blind spots, attacking you from below where your guns cannot physically aim.
Alternative Methods: Stealth and Evasion Tactics
If you lack the resources to build a heavily armored dreadnought early in your Starminer playthrough, you must rely on alternative survival methods. Brute force is not the only way to protect your fleet.
Alternative 1: The Low-Emission Stealth Miner
Aliens in Starminer detect your fleet based on heat signatures, radar emissions, and electromagnetic noise. By designing a specialized stealth miner, you can operate right under their noses. Use low-emission thrusters, install heat sinks to bury your thermal bloom inside the hull, and turn off your active radar, relying instead on passive sensors. If the aliens cannot see your heat signature from a distance, they will not warp in to attack you.
Alternative 2: Decoy Satellites and Bait Stations
When you arrive at a high-yield asteroid field, immediately deploy cheap, unmanned decoy satellites 10 to 15 kilometers away from your actual mining site. Equip these decoys with massive heat generators and loud, active radar pingers. When the alien faction detects your presence in the sector, their strike fleets will automatically gravitate toward the loudest target—your decoys. This buys your actual mining fleet plenty of time to extract the ore and jump out of the system before the aliens realize they have been tricked.
Advanced Tips: Creating the Ultimate Defense Grid
For those who want to stand their ground and turn alien swarms into scrap metal, you must master advanced naval architecture in Starminer.
Fleet Composition: Miners vs. Escorts
As you progress into the mid-to-late game of Starminer, relying on a single \”do-it-all\” ship becomes incredibly inefficient. A ship covered in heavy armor and massive weapons is too sluggish and consumes too much fuel to be an effective miner. This is where fleet composition comes into play.
You need to transition to a Carrier/Escort doctrine. Build dedicated, lightweight, highly efficient mining rigs that focus solely on extraction and cargo capacity. These ships should only carry basic point-defense to swat away stray missiles.
To protect them, you must construct dedicated Escort Frigates. These ships carry no cargo and no mining lasers; they are pure, unadulterated war machines. Group them with your miners and set their AI behavior to \”Defend Target.\” When an alien swarm approaches, your escorts will break formation, intercept the threat, and draw the aggro away from your fragile, resource-heavy miners.
Of course, building an armada of specialized military frigates requires a staggering amount of resources. Before you can even afford this level of military-grade hardware, you need to optimize your industrial income. Check out our comprehensive guide on Best Mining Routes & Fast Resource Farming in Starminer to fund your war machine. Without a massive influx of rare ores, your defense fleet will never make it out of the shipyard.
Alien Threat Classification & Countermeasures
Understanding what is dropping out of hyperspace is just as critical as the armor on your hull. Alien factions in Starminer deploy distinct vessel classes, each requiring a specific tactical response. If your turrets are targeting the wrong enemy type, your fleet will be overwhelmed in seconds.
| Threat Class | Enemy Behavior / Signature | Primary Vulnerability | Optimal Countermeasure |
|---|---|---|---|
| Swarm Drones | Fast, erratic movement; extremely low heat signature. | Weak structural integrity; susceptible to AOE damage. | Flak Cannons / CIWS |
| Interceptors | Target exposed sub-systems (thrusters/mining lasers). | Predictable linear strafing runs. | Tracking Gatling Lasers |
| Bombers | Fire long-range missile volleys; maintain heavy distance. | Slow turn rate; highly volatile payloads. | Point-Defense / Railguns |
| Capital Dreadnoughts | Massive thermal bloom; heavily shielded energy grids. | Sluggish maneuvering; blind spots on ventral hull. | Heavy Torpedoes / Escorts |
Program your targeting computers to prioritize Bombers first. A single unintercepted torpedo volley will bypass your kinetic armor and instantly core your reactor, whereas Swarm Drones will merely chip away at your outer plating.
Emergency Protocols: Salvaging a Losing Battle
Even with a perfectly designed defense grid, RNG can spawn an overwhelming alien armada that you simply cannot defeat. When your hull integrity drops below 40% and your CIWS turrets run dry, you must execute emergency survival protocols to save your cargo and crew.
The Ultimate Alternative: Bypassing the Grind with XMODhub
Let’s be brutally honest: designing the perfect, impenetrable combat fleet in Starminer takes an immense amount of trial and error. You will spend dozens of hours mining titanium and copper, only to watch your newly minted frigate get blown in half because you miscalculated the armor thickness over the reactor. The grind to rebuild can be soul-crushing and completely derail your enjoyment of the game.
If you want to focus on the joy of ship design, fleet commanding, and base building without the punishing penalty of losing hours of progress to a single design flaw, XMODhub is your ultimate quality-of-life upgrade. XMODhub offers powerful, undetectable enhancements specifically tailored for Starminer’s complex mechanics.
With features like Infinite Resources and God Mode / Indestructible Hull, you can treat the main game like a sandbox testing ground. Want to test if a new spaced-armor design can withstand a direct hit from an alien dreadnought? Toggle God Mode, spawn the ship, and test it in live combat without fear of losing your hard-earned materials.
Getting started is incredibly simple:

Stop grinding to replace lost ships and start dominating the galaxy on your own terms.
Frequently Asked Questions
A: Shields in Starminer are primarily designed to absorb energy weapons (lasers/plasma), not physical projectiles. Missiles will pass right through standard electromagnetic shields. To stop missiles, you must rely on physical countermeasures. Install fast-tracking CIWS (Close-In Weapon Systems) set to target projectiles, or deploy flare/chaff dispensers to break the missile’s tracking lock before it reaches your hull.
A: In the early game, you will not have access to advanced composite plating. Your best option is reinforced steel layered over a carbon-fiber backing. Steel provides decent kinetic resistance against low-tier alien railguns, while the carbon backing prevents the steel from shattering and causing internal module damage. Avoid using raw iron, as it is too heavy and will severely cripple your ship’s thrust-to-weight ratio.
A: Not by default. If you simply leave an armed ship near your miner, it will only defend itself if it is directly attacked. You must actively open the fleet command interface, select your escort ships, and assign them the \”Defend Target\” or \”Guard Area\” order, specifically clicking on your mining rig. Additionally, ensure their engagement rules are set to \”Aggressive\” so they intercept threats before they get within firing range of the miner.
A: This is almost always a power routing or heat dissipation issue. Energy weapons generate massive amounts of heat. If your ship lacks sufficient heat sinks or radiators, the weapons will automatically shut down to prevent melting your hull. Alternatively, if your weapons draw more power than your capacitors can supply, they will stall. Always ensure you have dedicated battery banks and cooling systems linked directly to your weapon hardpoints.
Conclusion
Surviving the brutal, uncompromising universe of Starminer requires a fundamental shift in how you view your fleet. You can no longer treat your ships as simple tools for resource extraction; they must be engineered as mobile fortresses. By implementing layered spaced armor, ensuring 360-degree point-defense coverage, strictly separating your power grids, and transitioning to a dedicated carrier-and-escort fleet doctrine, you will transform your fragile mining operations into an untouchable industrial empire. Remember, in Starminer, preparation is the ultimate weapon.
However, if the relentless grind of testing, failing, and rebuilding is draining the fun out of your spacefaring adventure, do not hesitate to leverage the power of XMODhub. Just as it has revolutionized the way players experience over 5,000 other complex titles like Space Engineers and Hardspace: Shipbreaker, XMODhub gives you the freedom to master Starminer’s deep mechanics without the punishing time sink. Build smarter, fight harder, and protect your fleet at all costs.

I am a passionate gamer and writer at XMODhub, dedicated to bringing you the latest gaming news, tips, and insights.
Connect with me:
LinkedIn Profile ↗